


User Tag List
 Thanks:
  Likes:
Results 1 to 15 of 496
Thread: 13' Bullet 130 Rebuild & Repower
-
04-21-2018, 04:31 PM #1
 5000 RPM
- Join Date
- Mar 2009
- Location
- Saint Lucie Florida
- Posts
- 800
- Thanks (Given)
- 47
- Thanks (Received)
- 21
- Likes (Given)
- 311
- Likes (Received)
- 514
- Mentioned
- 1 Post(s)
- Tagged
- 0 Thread(s)
 87 13' Bullet 130 Full Rebuild 100% COMPLETE
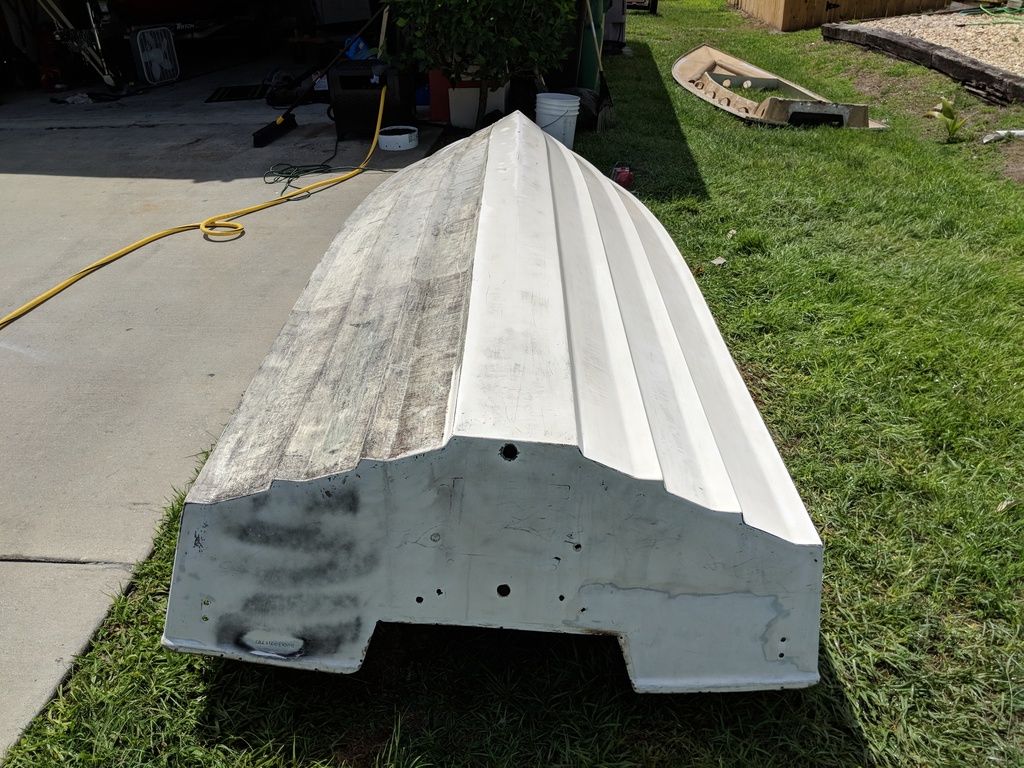
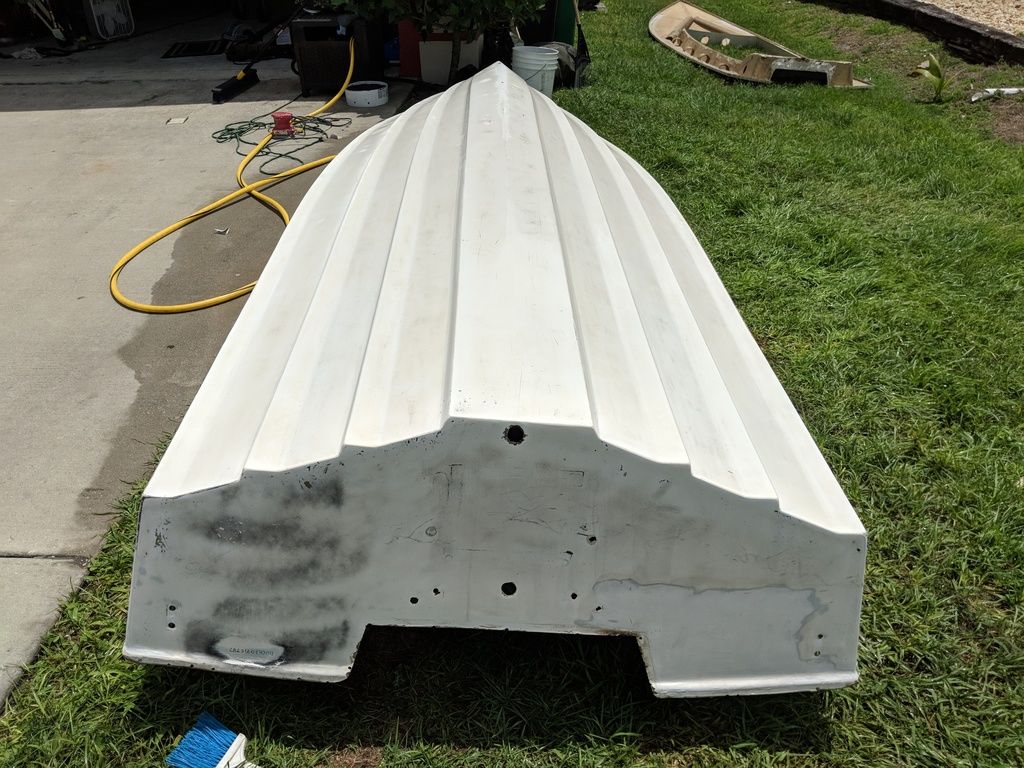
Whats up, Finally got my hands on another 13' bullet by bullet boats. Had one about 10 years ago gutted it and never finished it before I ended up selling it. Hopefully this one gets finished. Anyhow, The boat is being completely redone, My plans for the boat will be doing everything in composite materials starting by adding a core with using D-cell h80, 20" transom 1.5" thick using coosa?, stringers from coosa? more than likely as well and 1708 glass everywhere with vinyl ester resin. Should i go vinyl or poly? Not exactly sure what to use for the floor just yet. Im open to any suggestions, my main concern is strength and then keeping the boat as light as possible, I plan to take this boat through some very rough water like they were designed for. Boat will be rigged with a Mercury formula race 60hp with the 15" midsection 12x22 cleaver, im trying to avoid using a jack plate by all means so im curious if I should do a 20" transom or maybe 21"? I think I will also end up using transom wedges to allow for more negative trim to get the boat out of the hole a little better. Will be using hydraulic steering using the bay star kit. I will add more as I think of it, for now here are some pics of the progress.
Last edited by TwzteD; 04-04-2020 at 08:58 PM.
-
04-21-2018, 04:32 PM #2
5000 RPM
- Join Date
- Mar 2009
- Location
- Saint Lucie Florida
- Posts
- 800
- Thanks (Given)
- 47
- Thanks (Received)
- 21
- Likes (Given)
- 311
- Likes (Received)
- 514
- Mentioned
- 1 Post(s)
- Tagged
- 0 Thread(s)
Got 99% of the grinding done on the inside of the hull.
Last edited by TwzteD; 09-28-2019 at 08:30 AM.
-
 Sharkey-Images liked this post
-
04-21-2018, 04:32 PM #3
5000 RPM
- Join Date
- Mar 2009
- Location
- Saint Lucie Florida
- Posts
- 800
- Thanks (Given)
- 47
- Thanks (Received)
- 21
- Likes (Given)
- 311
- Likes (Received)
- 514
- Mentioned
- 1 Post(s)
- Tagged
- 0 Thread(s)
Put the deck back on will start sanding some of it tomorrow.
Last edited by TwzteD; 09-28-2019 at 08:36 AM.
-
04-23-2018, 06:07 PM #4
5000 RPM
- Join Date
- Mar 2009
- Location
- Saint Lucie Florida
- Posts
- 800
- Thanks (Given)
- 47
- Thanks (Received)
- 21
- Likes (Given)
- 311
- Likes (Received)
- 514
- Mentioned
- 1 Post(s)
- Tagged
- 0 Thread(s)
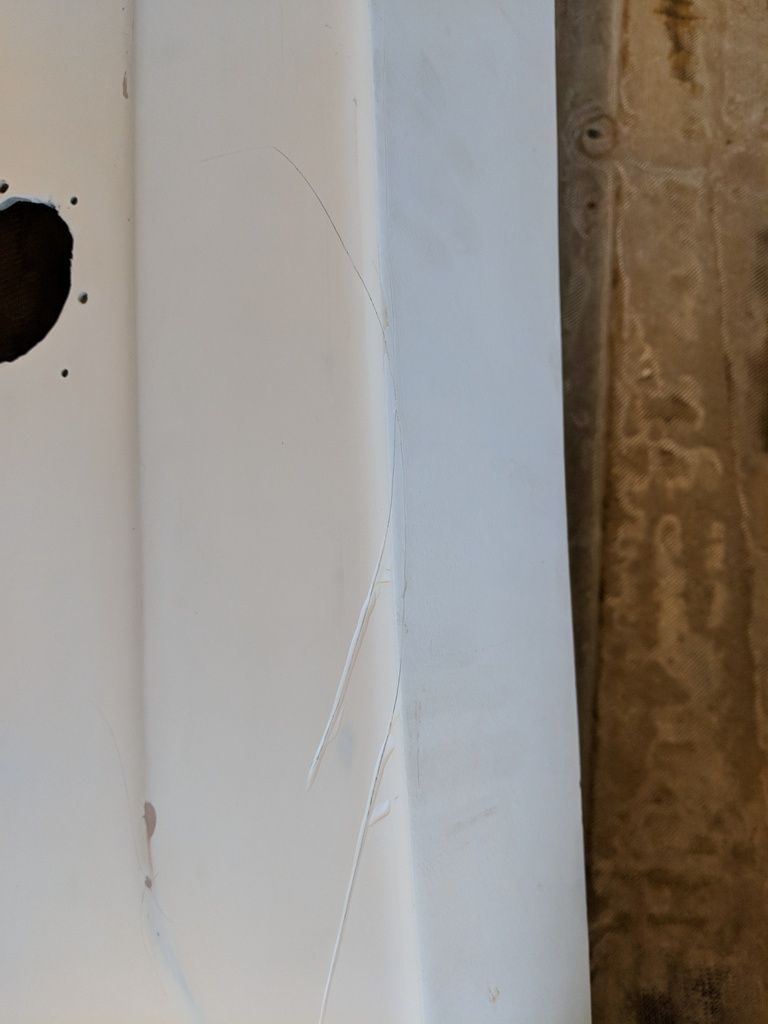
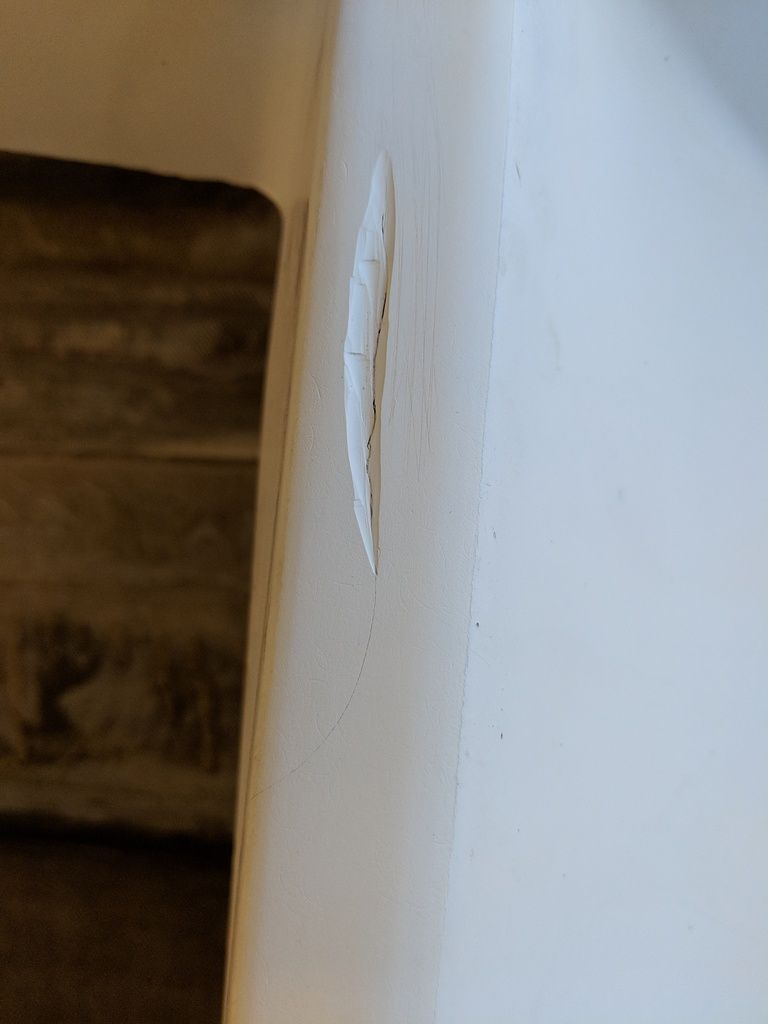
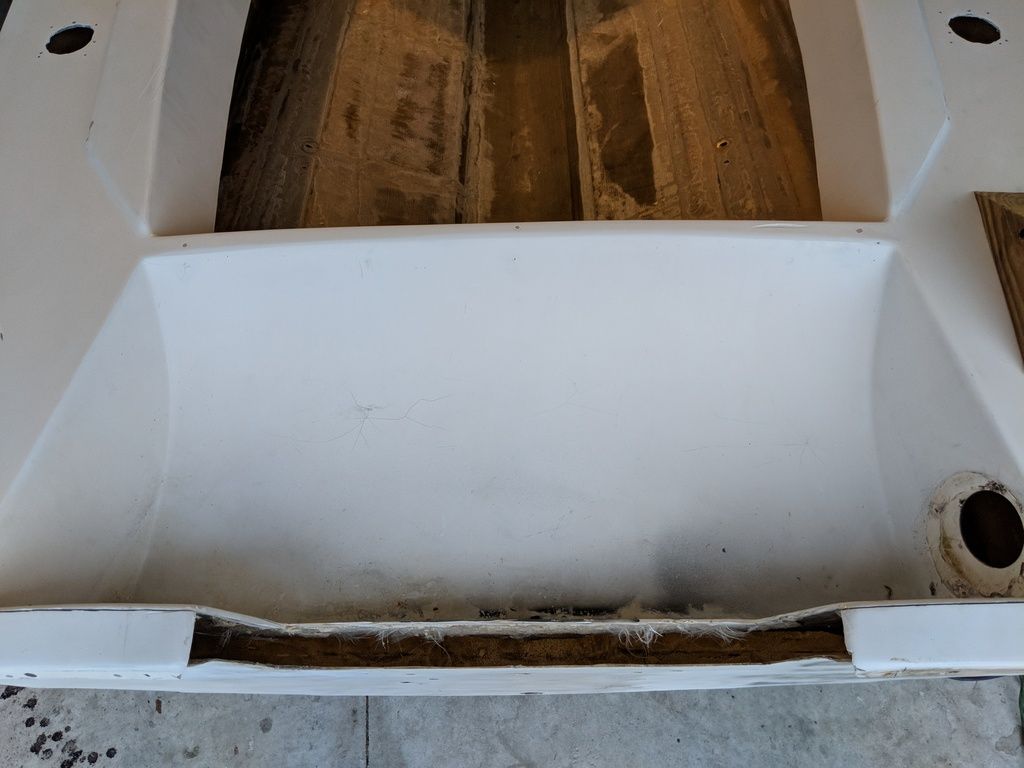
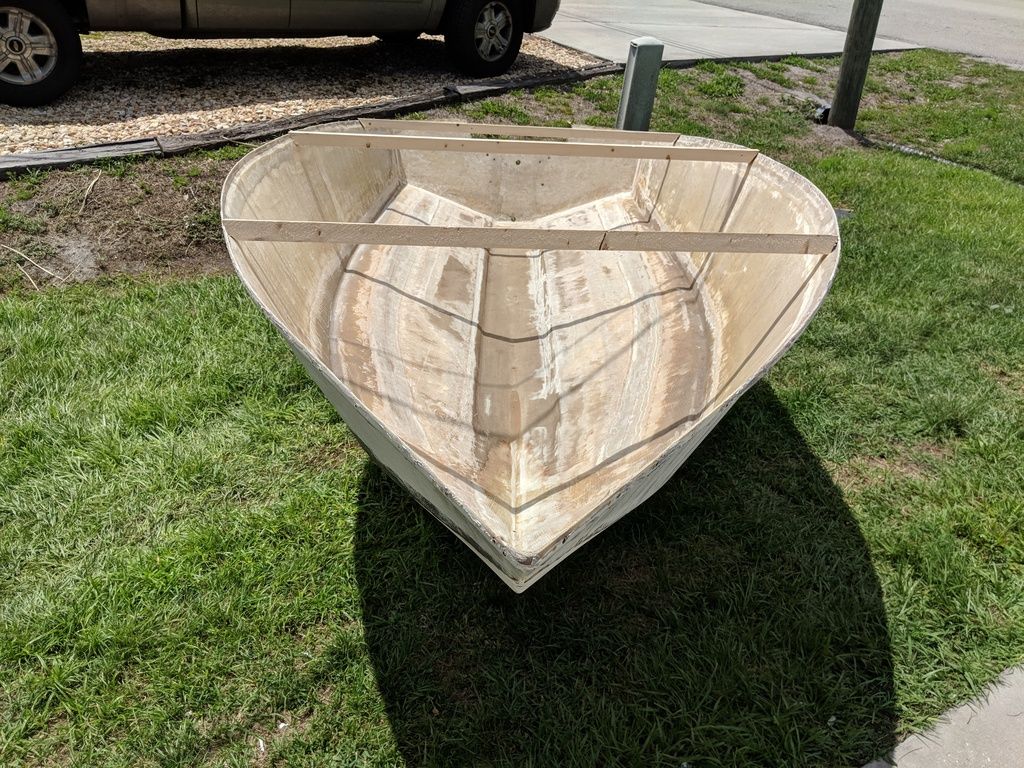
Ok so... I did a lot of paint removal today on the top deck and uncovered a lot of stress cracks that were covered by 3 layers of paint. these decks don't have much integrity to them, I plan on reinforcing it. Sharkey originally used balsa on his, so Should I use D cell in a lighter form or use H-80? The only rigidity that it has is what looks to be a cardboard roll cut in half and glassed over. In fact there are cracks right in that same spot at the same angle. Should i keep the spashwell or delete it? it has stress cracks inside as well and at the corners where it meets the transom from what i hear its prone to gracing in that spot which mine already has. If i reinforce the deck from the inside with core and glass, grind out the stress cracks (like I did in a few pics) I can then fill in cracks with filler correct or should I do something else? Also should i remove the tubes they used and start with a fresh flatter surface or go around them? Looking for recommendations. The top deck is going to have a lot of time in it I can see.
Here's pics of what reinforcements there are which is only in the front and what it looks like under it.
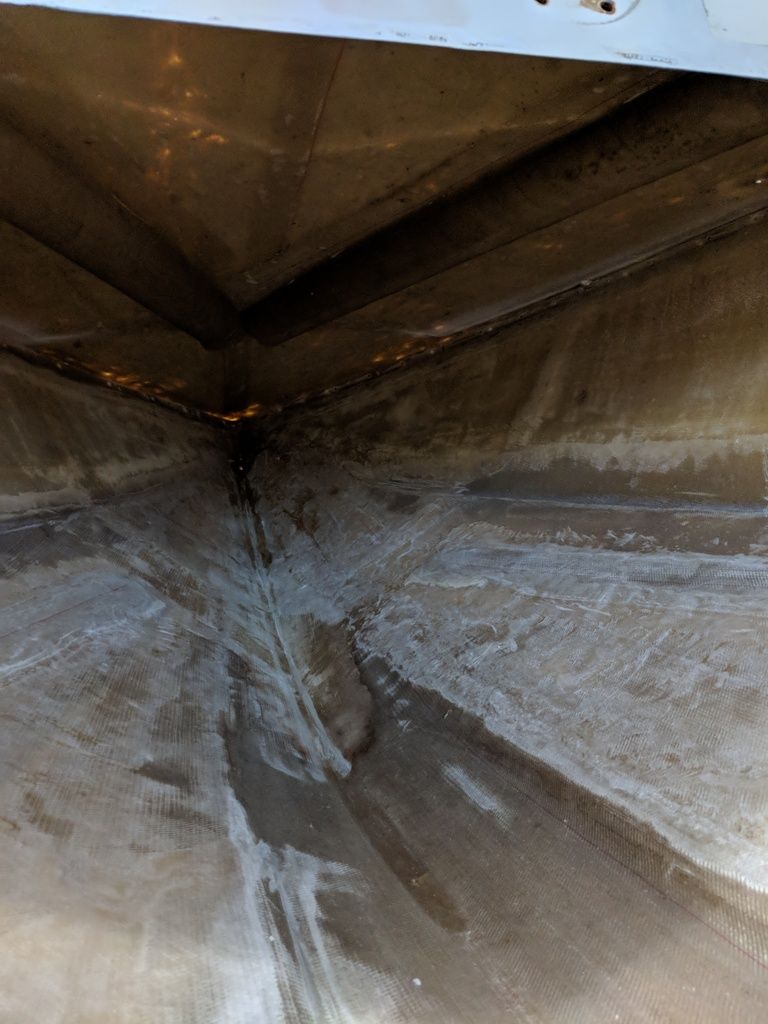
Here's some pics of a few stress cracks

Here's some pics of some ground out

Here's a pic of splash well
-
04-23-2018, 06:25 PM #5
6000 RPM
- Join Date
- Aug 2015
- Location
- NE Tennessee
- Posts
- 1,639
- Thanks (Given)
- 257
- Thanks (Received)
- 136
- Likes (Given)
- 1991
- Likes (Received)
- 618
- Mentioned
- 0 Post(s)
- Tagged
- 0 Thread(s)
Very cool project, and great pics.

Love rebuild threads.
Never seen a 13 ft. Bullet. It's going to fly with a 130 !!
Not sure if you have enough trailer for it though... James H. W2F a V-King... Want 2 Fly a V-King
Dedicated Site for Hydrostreams >> http://hydrostreamforums.com/
My Project 1979 V-King restore >> http://hydrostreamforums.com/viewtopic.php?f=9&t=2761
-
04-23-2018, 06:28 PM #6
Member
- Join Date
- Apr 2005
- Location
- Asheville, NC
- Posts
- 65
- Thanks (Given)
- 0
- Thanks (Received)
- 0
- Likes (Given)
- 0
- Likes (Received)
- 0
- Mentioned
- 0 Post(s)
- Tagged
- 1 Thread(s)
Wow this is great! I think 1708 is a good choice but I'm an epoxy man myself for all bonding chores. Are you going to tab the top to the bottom from the inside?
Consider prisma preforms: https://www.jamestowndistributors.co...t.do?docId=679
-
04-23-2018, 06:31 PM #7
Screaming And Flying!
- Join Date
- Mar 2008
- Location
- Tourist Trap, Florida
- Posts
- 14,753
- Thanks (Given)
- 381
- Thanks (Received)
- 1302
- Likes (Given)
- 5602
- Likes (Received)
- 11031
- Mentioned
- 2 Post(s)
- Tagged
- 1 Thread(s)
Cracks are mostly from the gell being too thick. HS-60 would be ok on the deck. Chase out the cracks and dish out the area some. Instead of filler use some glass fibers (chop strand). Ditch the tubes and core the deck. Make some replacements from glassing over some pvc pipe and install them if you want. The core should do it though. Splash well is your call...
83 V-King, 96 Mariner, 200 hp ff block 2.5 w/a 28p choppa
We gotta clean this liberal mess up, VOTE TRUMP TO MAGA!
Rebuild thread:
http://www.screamandfly.com/showthre...-it&highlight=
http://www.screamandfly.com/showthre...cs.&highlight=
Videos
-
04-23-2018, 06:37 PM #8
5000 RPM
- Join Date
- Mar 2009
- Location
- Saint Lucie Florida
- Posts
- 800
- Thanks (Given)
- 47
- Thanks (Received)
- 21
- Likes (Given)
- 311
- Likes (Received)
- 514
- Mentioned
- 1 Post(s)
- Tagged
- 0 Thread(s)
Thanks, built in the 80's in NJ. Not going with 130hp althought there was a guy who did put a 115hpomc on one, didnt handle very well. I will be using a Mercury formula race 60hp engine.
Rust, more than likely, I like epoxy also but its super stiff from what i hear a vinyl would be better so the boat can flex a little with the pounding it will get, Sharkey built his using vinyl ester and never had any cracking issues from what I have heard. Will more than likely tab them together after both top and bottom are done.
Thanks for the Suggestions X. If i keep the well, how do you recommend reinforcing it?Last edited by TwzteD; 04-23-2018 at 06:43 PM.
-
04-23-2018, 06:55 PM #9
Screaming And Flying!
- Join Date
- Mar 2008
- Location
- Tourist Trap, Florida
- Posts
- 14,753
- Thanks (Given)
- 381
- Thanks (Received)
- 1302
- Likes (Given)
- 5602
- Likes (Received)
- 11031
- Mentioned
- 2 Post(s)
- Tagged
- 1 Thread(s)
Reinforce the well where it is cracked. Core the whole thing and 1708 over the core. Make knees/stringers from bottom of well to the hull and also glassed to the transom. Tying it all together will make it plenty strong. Knees just outside of the motor mounting bolts is good. They are 13'' or so apart. So maybe knees 16'' apart. Any plans for stringer locations? Using a floor?
83 V-King, 96 Mariner, 200 hp ff block 2.5 w/a 28p choppa
We gotta clean this liberal mess up, VOTE TRUMP TO MAGA!
Rebuild thread:
http://www.screamandfly.com/showthre...-it&highlight=
http://www.screamandfly.com/showthre...cs.&highlight=
Videos
-
04-23-2018, 07:03 PM #10
5000 RPM
- Join Date
- Mar 2009
- Location
- Saint Lucie Florida
- Posts
- 800
- Thanks (Given)
- 47
- Thanks (Received)
- 21
- Likes (Given)
- 311
- Likes (Received)
- 514
- Mentioned
- 1 Post(s)
- Tagged
- 0 Thread(s)
Thats what I had planned with tieing in the transom, stringers and top deck. As far as stringers Well ideally I would like to do it the way Sharkey did on his since it worked well.
Last edited by TwzteD; 09-28-2019 at 08:22 AM.
-
04-28-2018, 07:47 PM #11
5000 RPM
- Join Date
- Mar 2009
- Location
- Saint Lucie Florida
- Posts
- 800
- Thanks (Given)
- 47
- Thanks (Received)
- 21
- Likes (Given)
- 311
- Likes (Received)
- 514
- Mentioned
- 1 Post(s)
- Tagged
- 0 Thread(s)
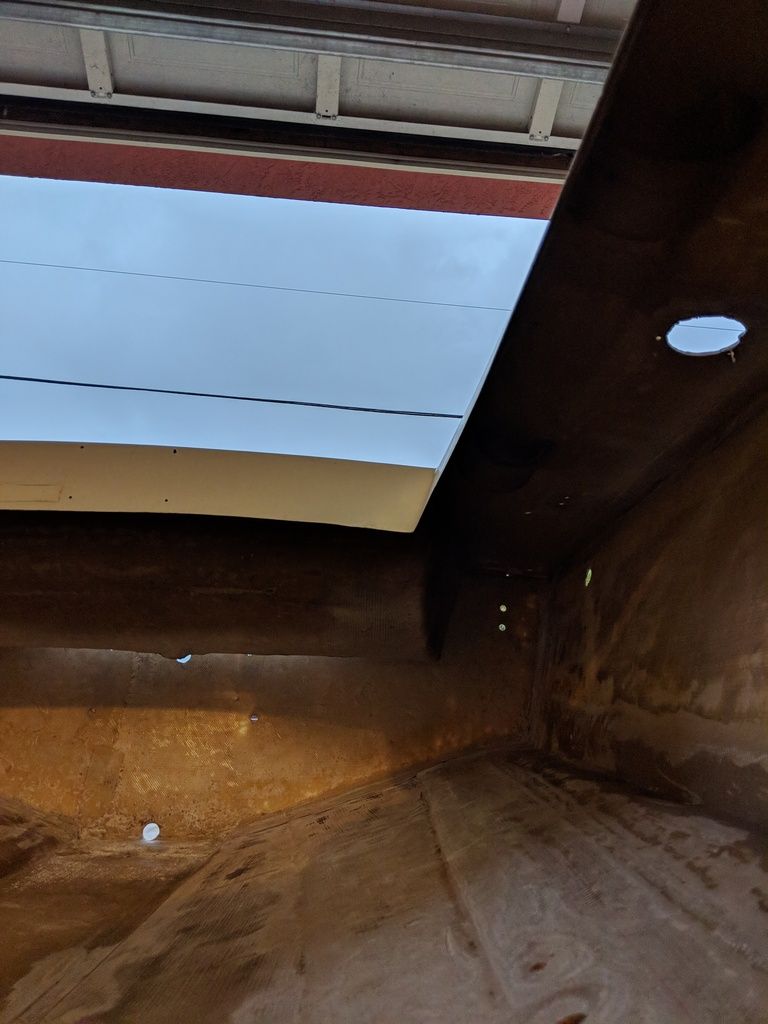
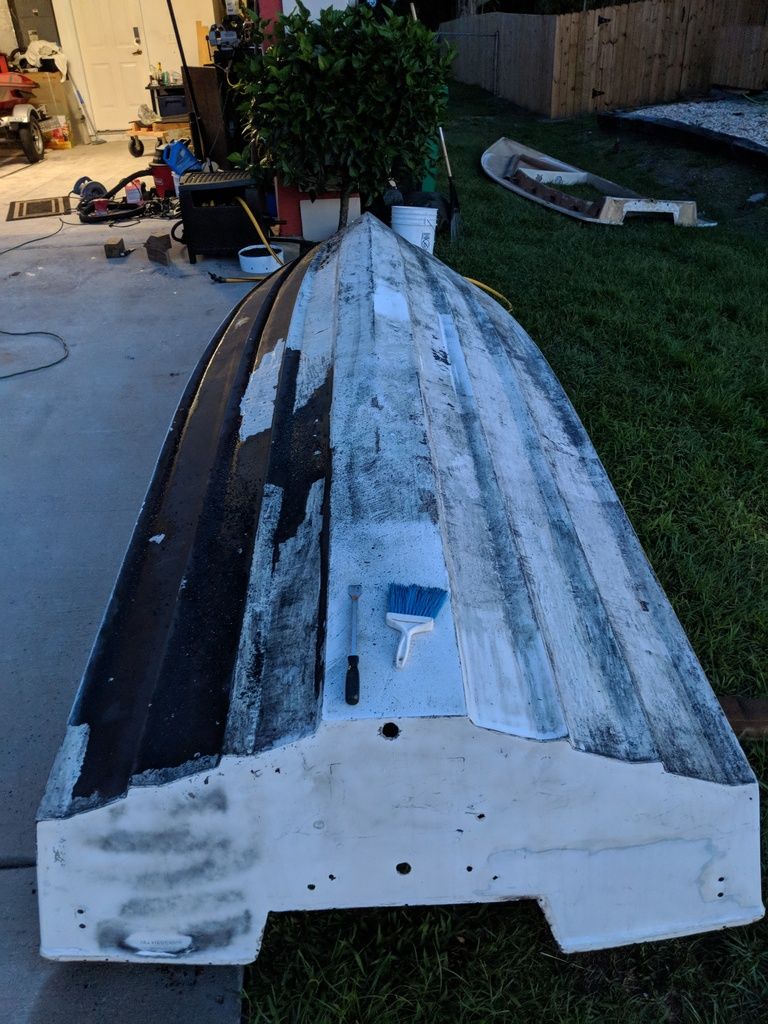
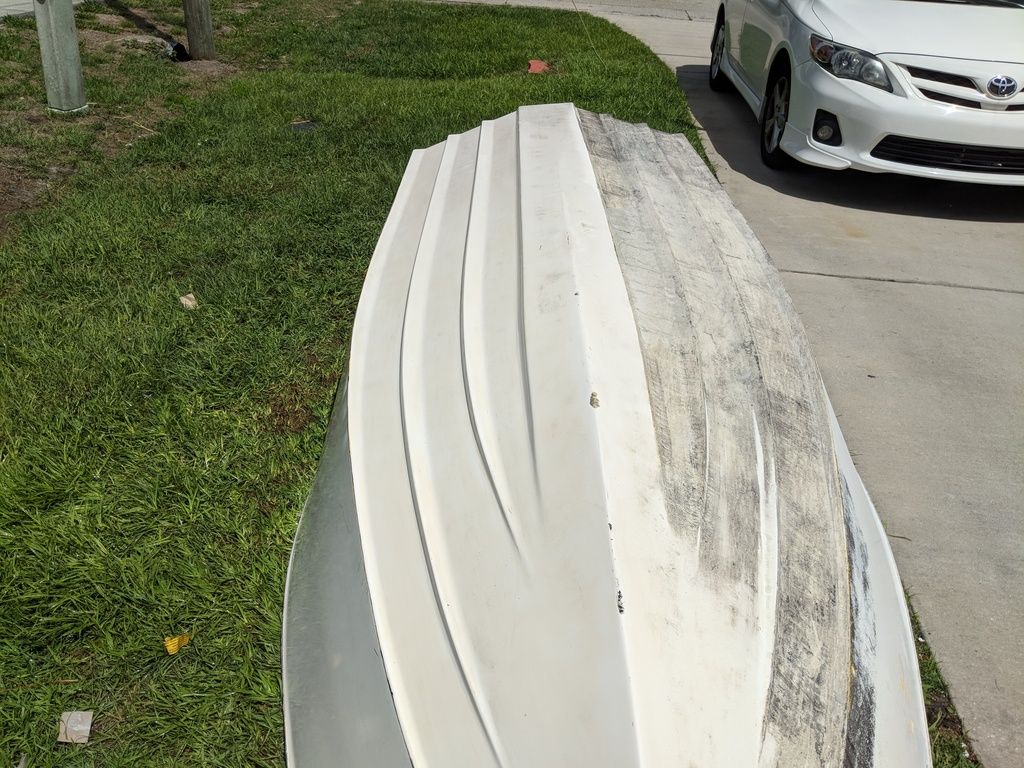
So for the last few days after work I have been making progress on the bottom, I have chosen to scrape off the bottom paint in order to keep the chines from rounding and what not making less to sand. Luckily for me they didn't do very good prepping and its coming off fairly easy, however I have a 1" scraper that is working best so its time consuming to say the least. After im done which should be tomorrow, i will take a square palm sander to the whole bottom. Hopefully this will keep the chines sharp and require less filling later. On a side note, dose anyone know if its ok if i stamp the hull number in aluminum after the boat is done and say epoxy it to the back of the hull? im not really a fan on the engraved numbers, and after I paint it im not sure if they will even be visible, I had to already re engrave them from the last paint job just because but I can stamp them in aluminum.
Last edited by TwzteD; 04-28-2018 at 07:50 PM.
-
04-28-2018, 10:27 PM #12
Member
- Join Date
- Jun 2010
- Location
- over there a minute ago
- Posts
- 81
- Thanks (Given)
- 11
- Thanks (Received)
- 5
- Likes (Given)
- 90
- Likes (Received)
- 20
- Mentioned
- 0 Post(s)
- Tagged
- 0 Thread(s)
Sweet find , TwzteD !!! Thought that I would chime in with my two cents . Before you start glassin' in your core , stringers and bulkheads you might give some consideration into building a jig to support the hull in order to maximize the benefits of the design of that beauty . Fiberglass has a tendency to move over time and stripping her down to the bare skin has caused even more movement . With your apparent skill level it shouldn't be to hard to build a quick jig that will hold the pad laser strait , make sure that the keel has no hook (an arc in the keel in which the bow , stern or both is lower than the center of the keel) or rocker (where the bow , stern or both are higher than the center of the running plane of the keel) . Once you get the pad and keel all lined up you need to make sure that the two sides of the bottom of the boat perpendicular to the keel are mirror images of one another and you are almost ready to start glassing in the new stuff . If you are planning on re-using the old cap then the next step is to either put it on the boat or take some measurements from it and use some clamps , rope or whatever you have laying around to hold the top of the hull along the gunnel in position until everything has been cut , fitted and glassed in . I hope all of this makes sense and you can use some of it . If not , there is a lot of knowledge and good advise on this board . Good luck with your project , she looks like she holds a lot of future grins !!!
-
04-29-2018, 02:31 PM #13
5000 RPM
- Join Date
- Mar 2009
- Location
- Saint Lucie Florida
- Posts
- 800
- Thanks (Given)
- 47
- Thanks (Received)
- 21
- Likes (Given)
- 311
- Likes (Received)
- 514
- Mentioned
- 1 Post(s)
- Tagged
- 0 Thread(s)
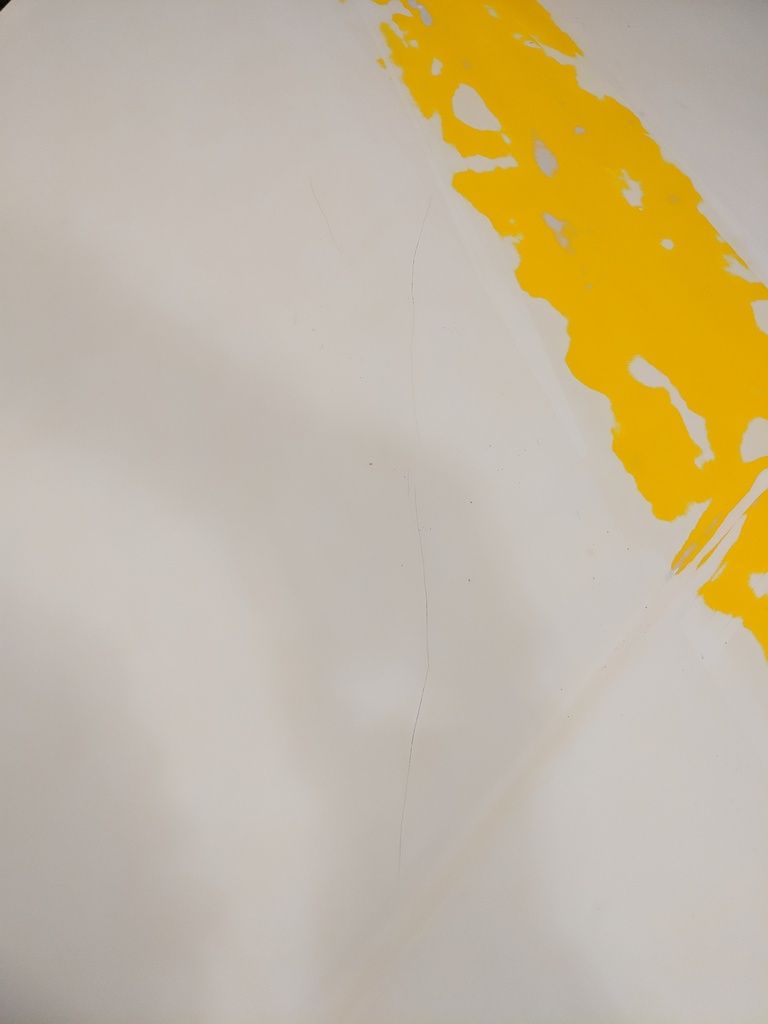
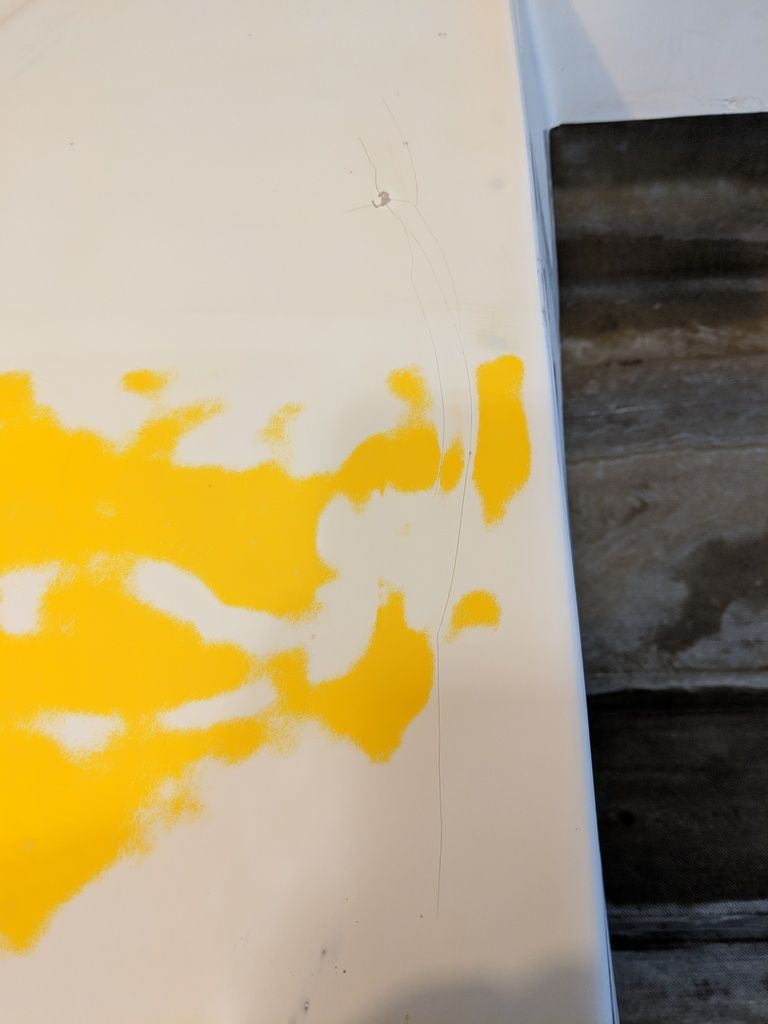
Thanks for the Help full tips, i had planned to make a jig before i start glassing, The boat is actually pretty stiff on the bottom especially, the lifting strakes on the bottom are filled solid and glassed over like mini stringers. Question i have is how to i make sure both sides are identical or close? is there a special way to do this?. I have the hull supported from the inside temporarily. I finished the sanding of the bottom, few areas will need to be repaired and some bubbles will need to be filled. Here's some pics. Originally Posted by capt bart

-
04-30-2018, 10:30 PM #14
Member
- Join Date
- Jun 2010
- Location
- over there a minute ago
- Posts
- 81
- Thanks (Given)
- 11
- Thanks (Received)
- 5
- Likes (Given)
- 90
- Likes (Received)
- 20
- Mentioned
- 0 Post(s)
- Tagged
- 0 Thread(s)
Although I am not used to explaining things like this in text I'm going to give it a shot . So bear with me , I'm sure that if I leave something out or send you down the wrong path that someone on here will set you strait as there are some members on this forum that possess mad skills in many disciplines .
The easiest jig to make resembles a ladder and can be mocked up with common 2x? lumber . The straighter , the better . From this you will want to frame your jig by making a box that is as wide as your transom and a few feet shy of the length of your boat (the last few feet of the bow will follow the rest and usually don't need support) . Once the box is made you need to put your straightest board in the center of the jig running fore and aft to carry the pad and the keel . The last two jig boards will go fore and aft halfway from the center (keel) board to the outside board in the port and starboard sides of the jig . Now is a good time to level the jig and prepare everything for setting the hull on .
Before you put the hull on the jig get your tape measure and blue tape (no , the color doesn't matter) out and starting where the transom meets the pad place a piece of tape on the keel every foot and a half to two feet so that it can be seen from both sides under the boat . The next step is to set the boat on the jig and get the pad perfectly level fore and aft and side to side . Not close - dead nuts perfect !!! You will probably have to do some slight shimming along the keel (hopefully not much at all until you get further up the hull where the keel starts to rise) and do some blocking on each side of the stern of the boat underneath the transom perpendicular to the keel . Check the pad , it has to be level . If you have to screw it down , no big deal . as much glass work as you have ahead of you a couple of screw holes aren't going to matter .
Now you can start working your way from the transom towards the bow by placing supports at the stations that you marked every foot and a half to two feet (remember the tape ?) . Do each foot and a half to two feet section at a time working your way toward the bow (not one side of the boat and then the other) . The object here is twofold . One is to support the skin of the hull for glassing and the other is to try to get the hull sides as symmetrical as possible . You will never get them perfect because to this day there has never been a boat made that is exactly the same on both sides .
Anyhow , some will have to go up a little , some will have to go down and some might be close enough for the girls you know . It's not a science , just build you some 2x? supports at your previously measured stations and use straps , wedges , cinder blocks , sand bags or whatever is laying around to stabilize and straighten your hull .
hopefully you can get some use out of this . if you happen to know somebody in so. florida that has one of these hulls and his wife is tired of looking at it , hit me up . i checked out the sharkey collection and one of these things looks like it would be just what i need .
capt bart
-
05-01-2018, 05:00 AM #15
5000 RPM
- Join Date
- Mar 2009
- Location
- Saint Lucie Florida
- Posts
- 800
- Thanks (Given)
- 47
- Thanks (Received)
- 21
- Likes (Given)
- 311
- Likes (Received)
- 514
- Mentioned
- 1 Post(s)
- Tagged
- 0 Thread(s)
Thanks for the info, best place to find these boats is up north in NJ area. I posted an ad on craigslist and someone said they had one willing to sell. As far as performance is concerned, is it worth the hassle to Square or sharpen the pad and lifting strakes? or is a sligh ratius on the edges ok? I know that would be alot of extra work. Originally Posted by capt bart


 Reply With Quote


Similar Threads
-
Evinrude XP200 Rebuild or Repower
By Stoker88 in forum Props, Setup, and RiggingReplies: 6Last Post: 09-09-2020, 11:06 PM -
83 Bullet Rebuild Update
By One Oldman in forum Fiberglass and Composites DiscussionReplies: 2Last Post: 06-02-2013, 10:10 PM -
30' velocity rebuild/repower/reeverything
By biohzrd in forum General Boating DiscussionReplies: 66Last Post: 08-03-2010, 10:39 AM -
Repower advice: OptiMax or rebuild 2.5EFI
By mercfan1 in forum General Boating DiscussionReplies: 8Last Post: 11-11-2008, 09:02 PM


