


User Tag List
 Thanks: 0
 Likes: 0
Results 1 to 15 of 34
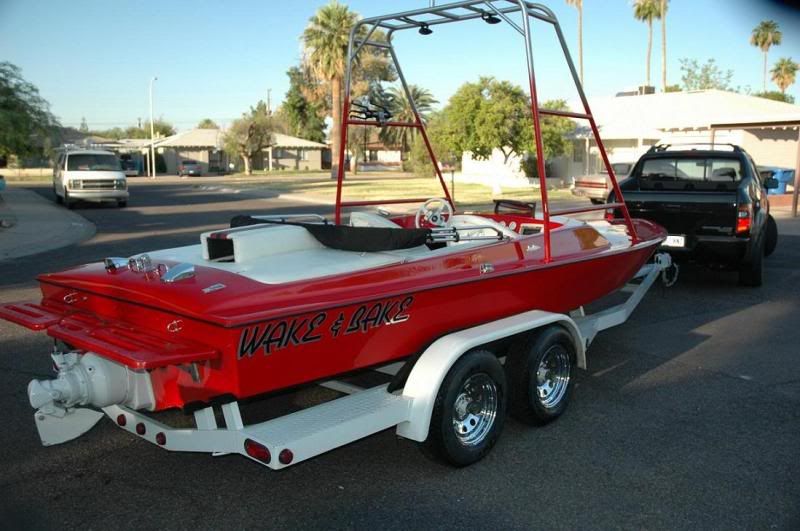
Thread: 1978 Kachina 454BBC hull resto
-
10-25-2009, 11:25 AM #1
 Member
- Join Date
- Feb 2007
- Posts
- 31
- Thanks (Given)
- 0
- Thanks (Received)
- 0
- Likes (Given)
- 0
- Likes (Received)
- 0
- Mentioned
- 0 Post(s)
- Tagged
- 0 Thread(s)
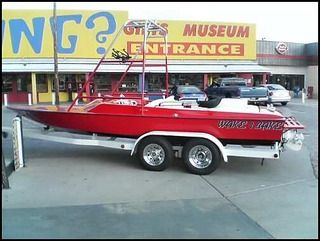
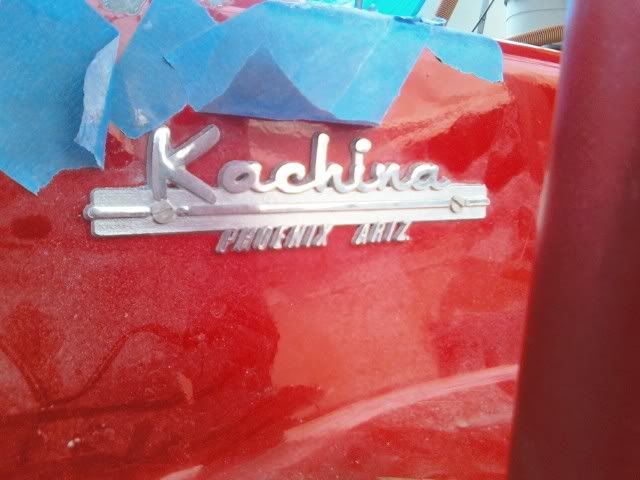
1978 Kachina 454BBC hull resto
figured I would post this over here for any comments suggestions and ....
I am just going to copy/paste this from my car forum over to here. I had it in our project logs forum there so it is vague and maybe a bit dumbed down for the car crowd that dont know boats or jet boats. So im not going to go through and edit it to make it a new post here. If you have any questions or advice let me know.
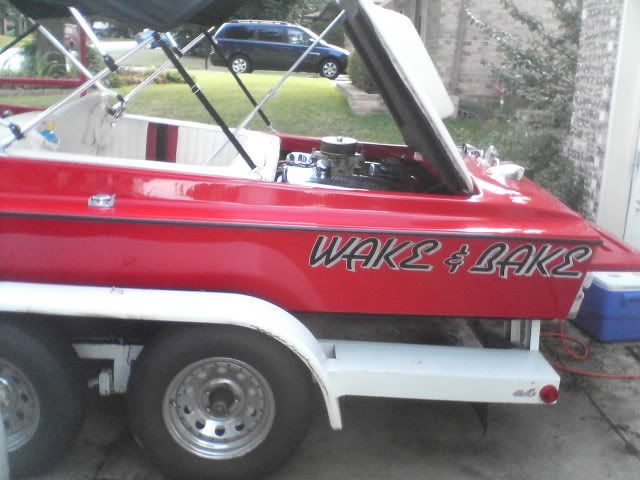
Ok so i bought this boat back in 2004 i think when living in TX. I drove out to AZ to pick it up. Thats another great story of its own. The boat is a 1978 made by Kachina boats whom is still in business still making custom boats. Although they make much larger boats now. Had a lot of fun in the boat until one of the fuel tanks started to leak due to the adding of ethanol to our fuel and fiberglass gas tanks. ******* regulations on fuel. After cutting out the tanks one thing lead to another and eventually i got the boat back to CA for some major work. So here was the boat basically when i bought it.
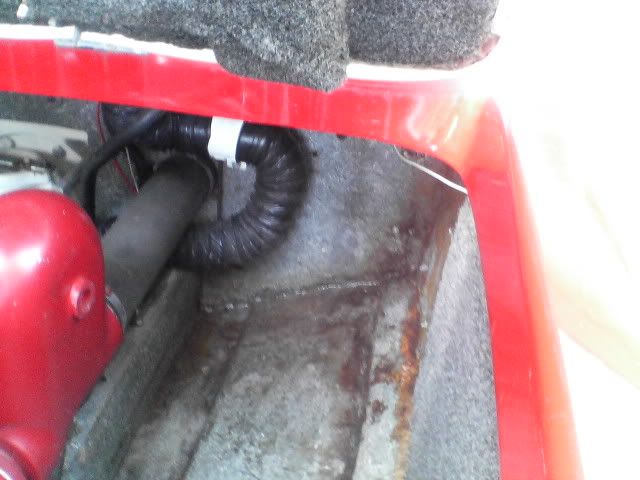
Leaking tanks.. coming through crack where tanks are tabbed in to hull. Means the actual tank is leaking and the fuel is making its way out of where they were glassed in. There are one tank on each side. Like 70 gallons of fuel +
flushing them heavily...

-
10-25-2009, 11:26 AM #2
Member
- Join Date
- Feb 2007
- Posts
- 31
- Thanks (Given)
- 0
- Thanks (Received)
- 0
- Likes (Given)
- 0
- Likes (Received)
- 0
- Mentioned
- 0 Post(s)
- Tagged
- 0 Thread(s)
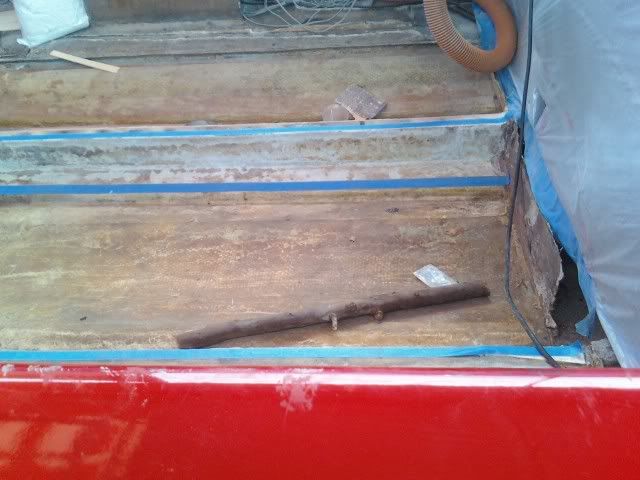
Then after getting the tanks out I figured I might as well keep going and took the floor out and all wet soaked foam from 40yrs ago.
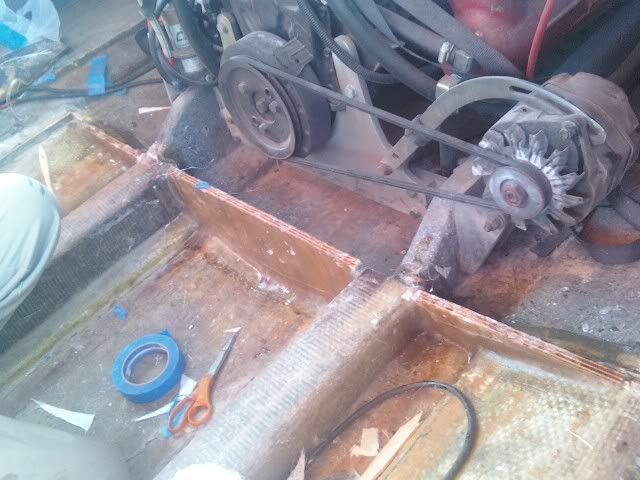
Then started to look at the stringers and we decided to sister them up and fix some stress cracks in the hull and other places.
So the boat came off the trailer so that the stringers could be fixed and everything would be relaxed while glassing in the new:
-
10-25-2009, 11:27 AM #3
Member
- Join Date
- Feb 2007
- Posts
- 31
- Thanks (Given)
- 0
- Thanks (Received)
- 0
- Likes (Given)
- 0
- Likes (Received)
- 0
- Mentioned
- 0 Post(s)
- Tagged
- 0 Thread(s)
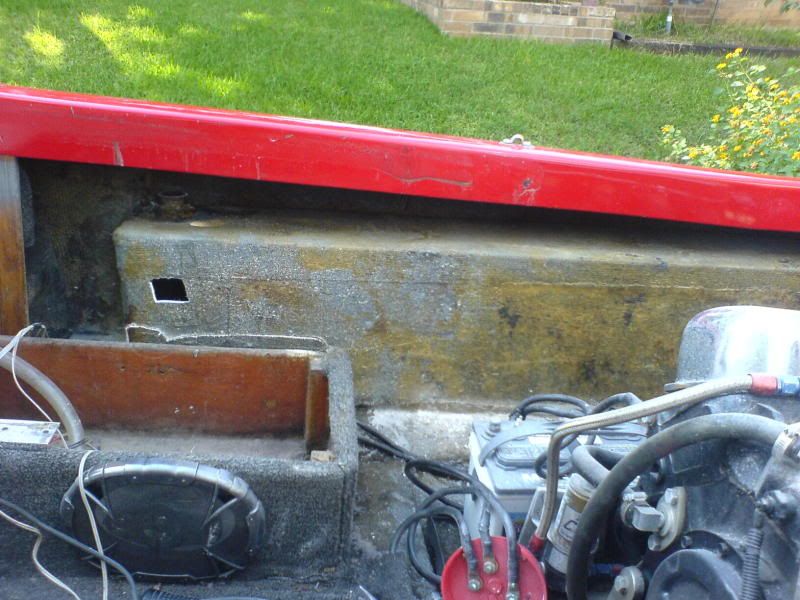
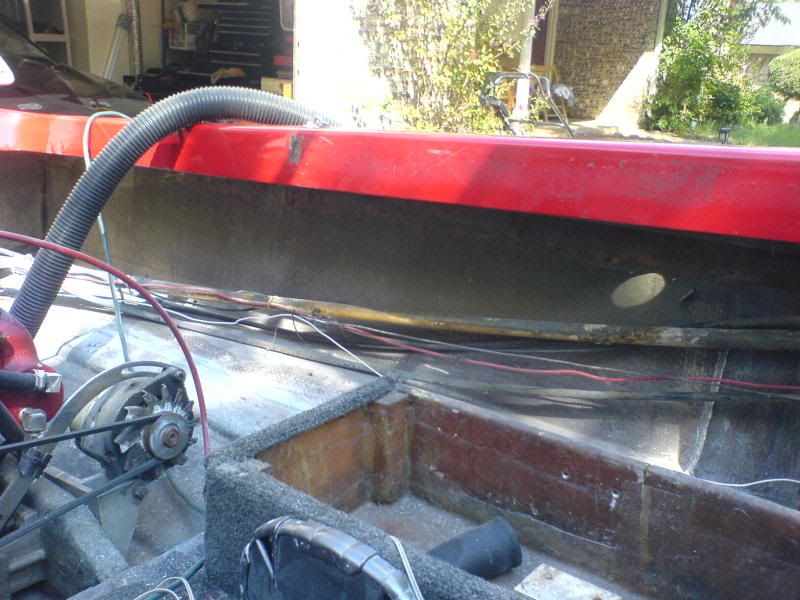
hundreds of hours in glass work grinding away cracks from the inside and outside to fix them properly. Had some cracks where my bimini top hit the fiberglass and where some douche bag jumped on the front of the boat while tied up partying one day on the lake. All getting fixed.
Also fixing some stress cracks in the gel coat below water line.
Here are some pics of that
Old stringers treated, shaved down and getting read for new stringers next to them. wait and see.
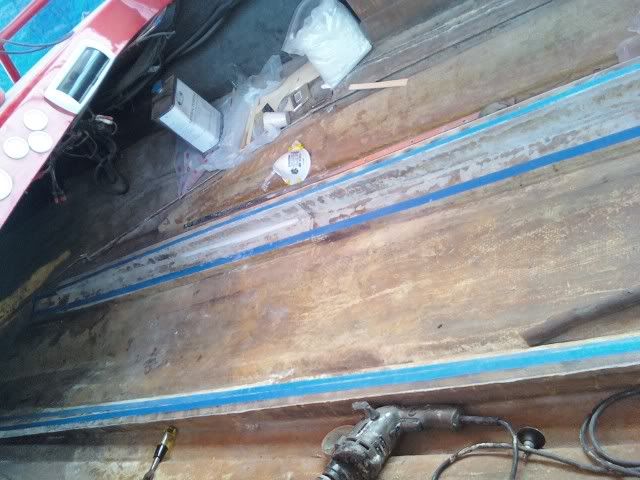
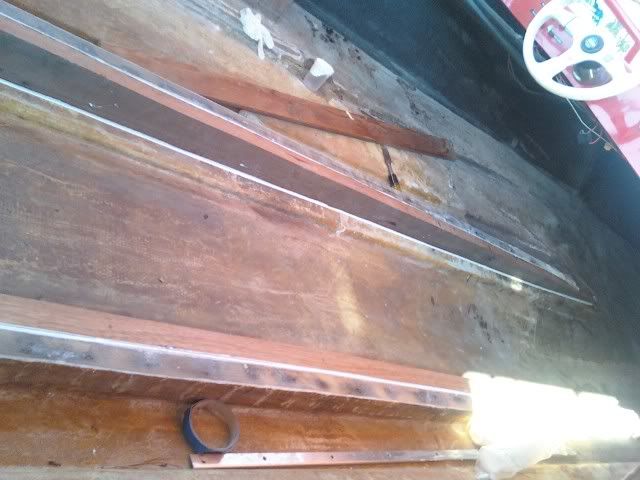
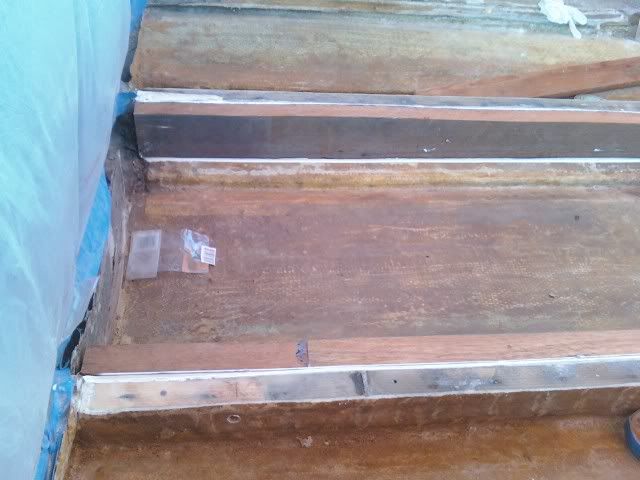
New stringers.... Now thats a nice piece of support
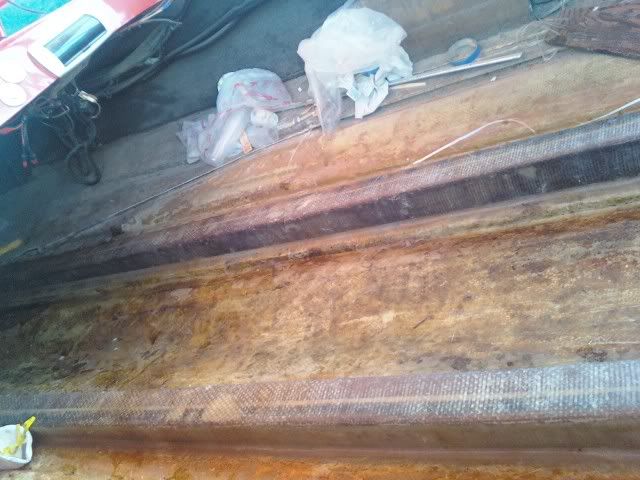
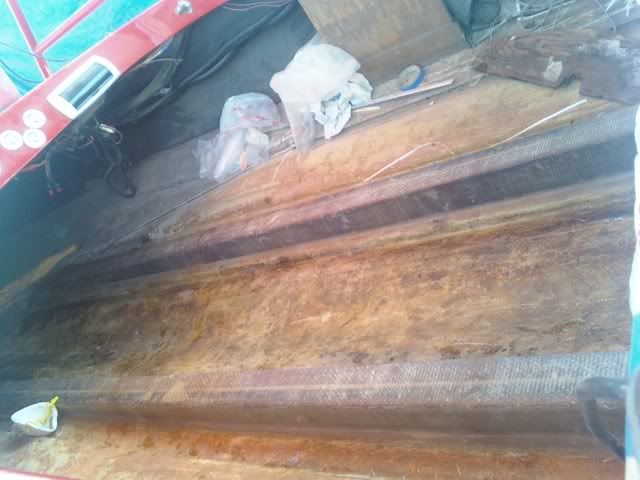
New bulk head being worked on which will have drain going through it later
-
10-25-2009, 11:27 AM #4
Member
- Join Date
- Feb 2007
- Posts
- 31
- Thanks (Given)
- 0
- Thanks (Received)
- 0
- Likes (Given)
- 0
- Likes (Received)
- 0
- Mentioned
- 0 Post(s)
- Tagged
- 0 Thread(s)
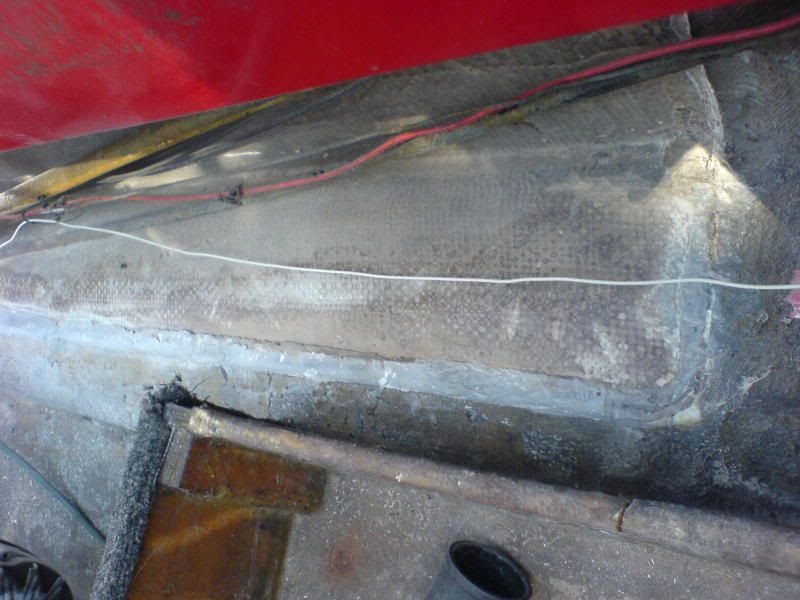
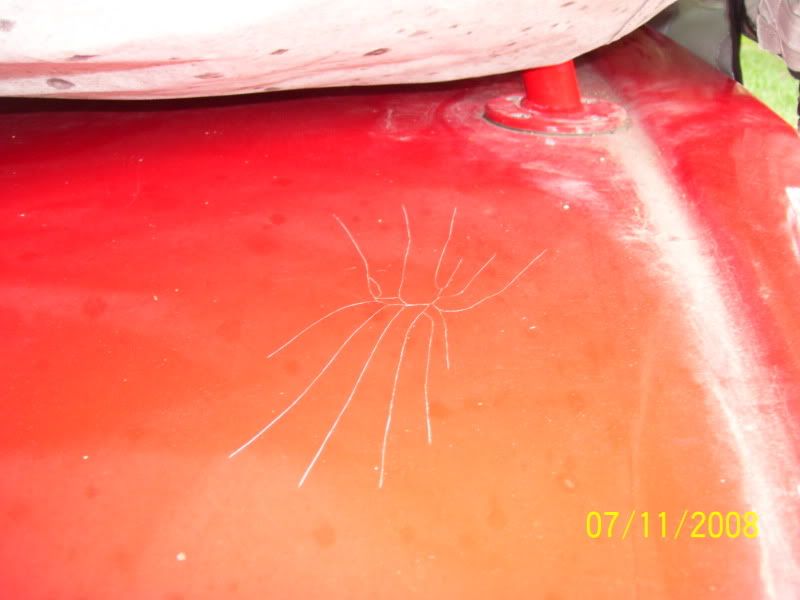
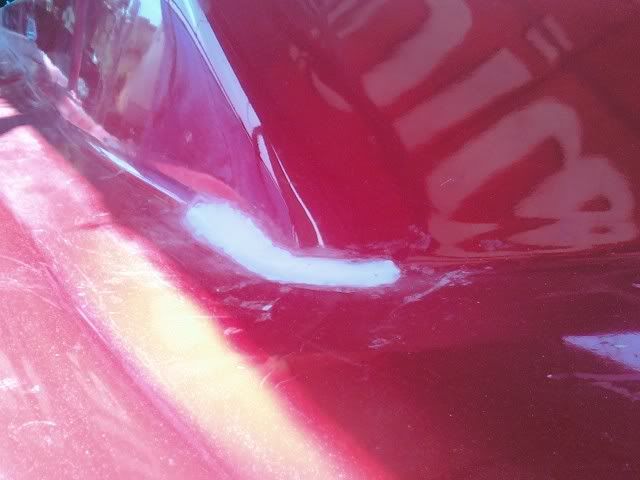
Here was a spot on the right side that had a bunch of spider webbing i wanted to deal with... here is start to finish. Besides paint obviously.
this is ground down then fiberglassed over with a heave weave and feathered in and then sanded down and filled.
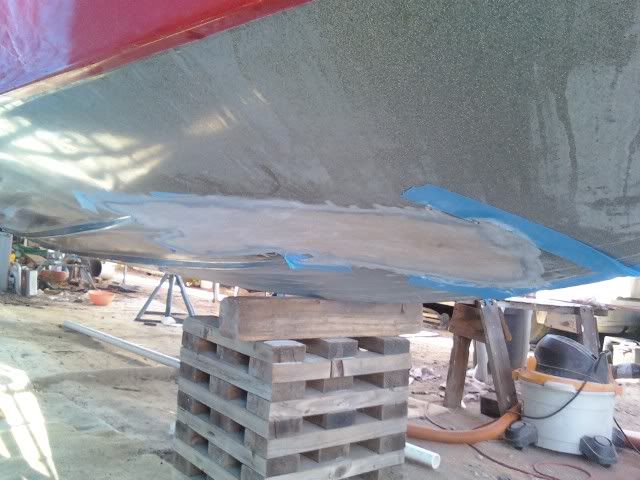
anything more to that area will be done by the body shop before paint.
-
10-25-2009, 11:28 AM #5
Member
- Join Date
- Feb 2007
- Posts
- 31
- Thanks (Given)
- 0
- Thanks (Received)
- 0
- Likes (Given)
- 0
- Likes (Received)
- 0
- Mentioned
- 0 Post(s)
- Tagged
- 0 Thread(s)
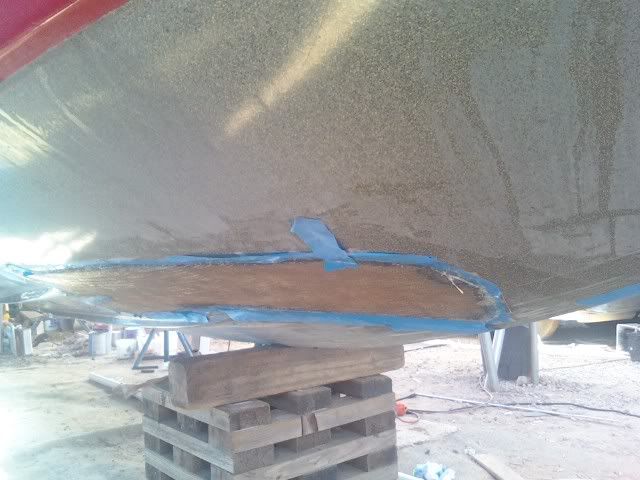
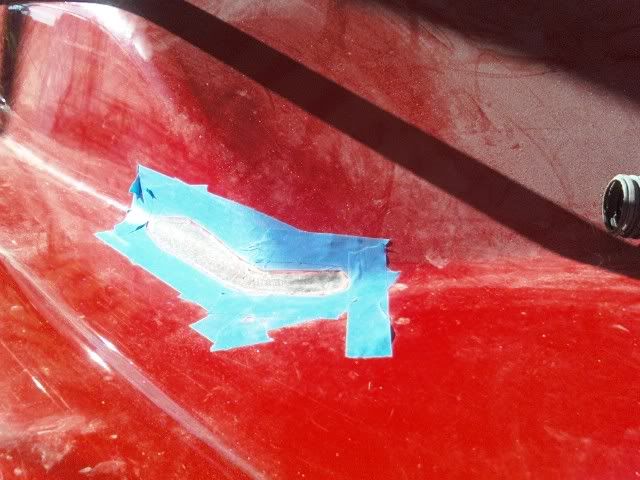
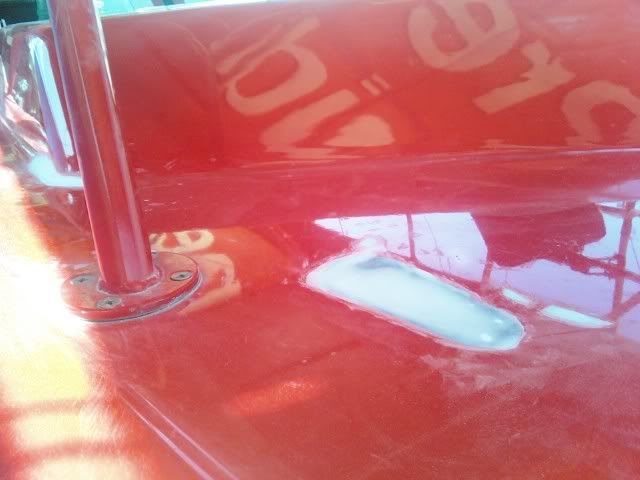
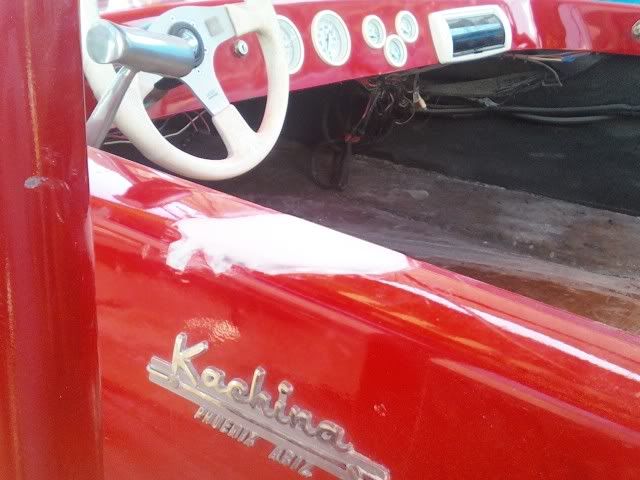
SO here is where some douche jumped on the boat from another higher boat while tied up in a group. Not structural but needed to be fixed. Looks worse in pics as always
start to finish as the other. That is not bondo but a thick fiberglass then resin over with fiberglass filler. Little bit of bondo type stuff is ok but you cant fill large areas.
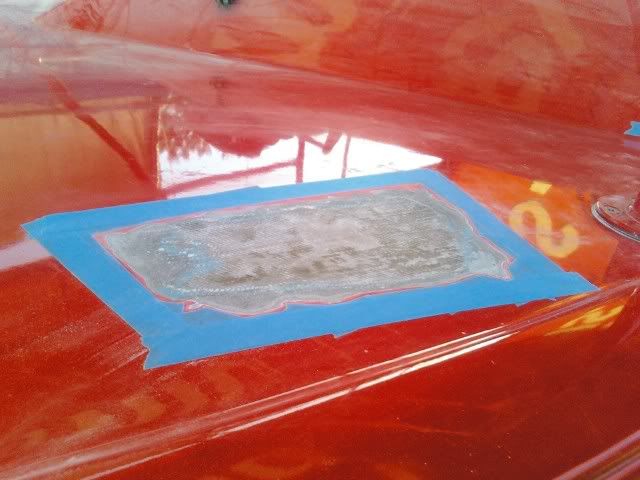
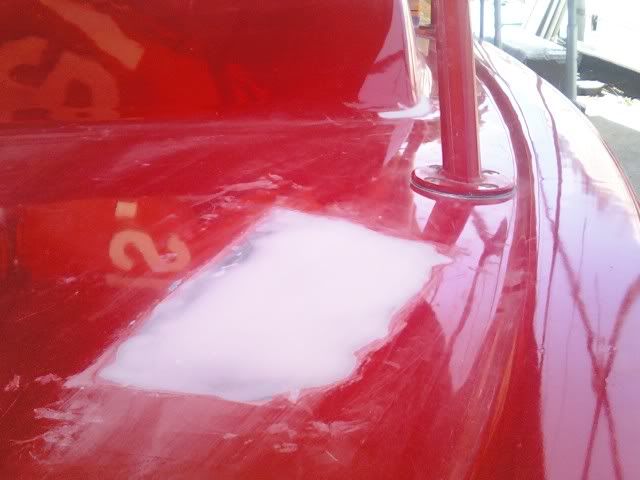
had these cracks on either side of the windshield area. you can see the other side in the above pic
-
10-25-2009, 11:28 AM #6
Member
- Join Date
- Feb 2007
- Posts
- 31
- Thanks (Given)
- 0
- Thanks (Received)
- 0
- Likes (Given)
- 0
- Likes (Received)
- 0
- Mentioned
- 0 Post(s)
- Tagged
- 0 Thread(s)
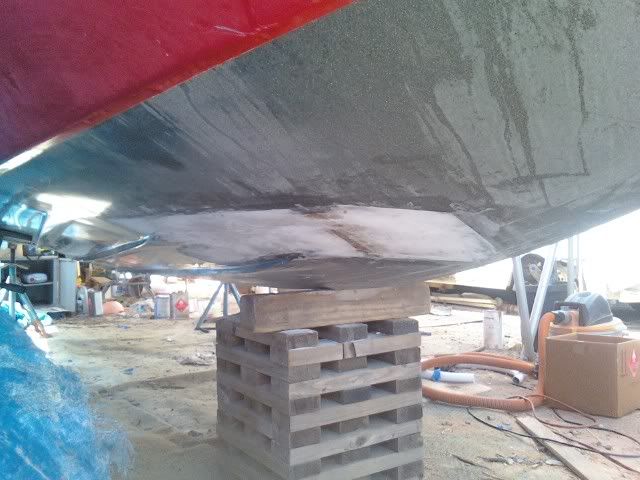
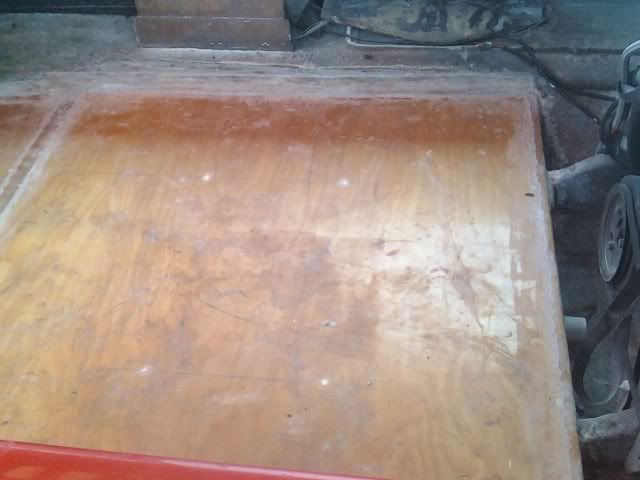
Also took care of a crack that was all the way through the hull basically due to the floor being weak and the stringers taking the brunt of it.
The crack was probably done while on the trailer because it wasnt fitting like it should and its been towed thousand of miles in its life. So that is being fixed too
Anyways. Wish i had pics of it before. Maybe i do somewhere and ill update if i find it
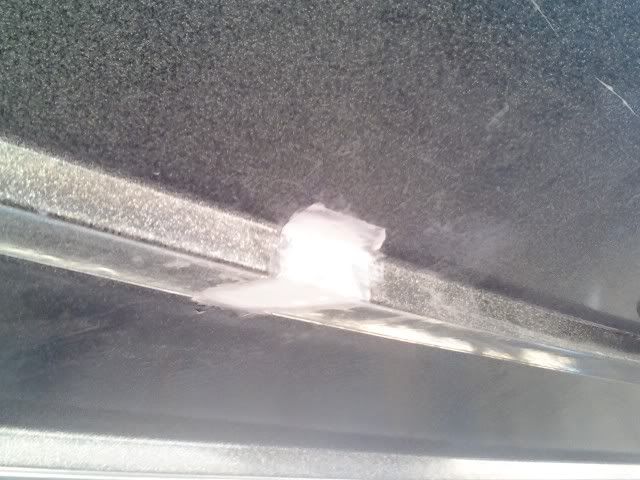
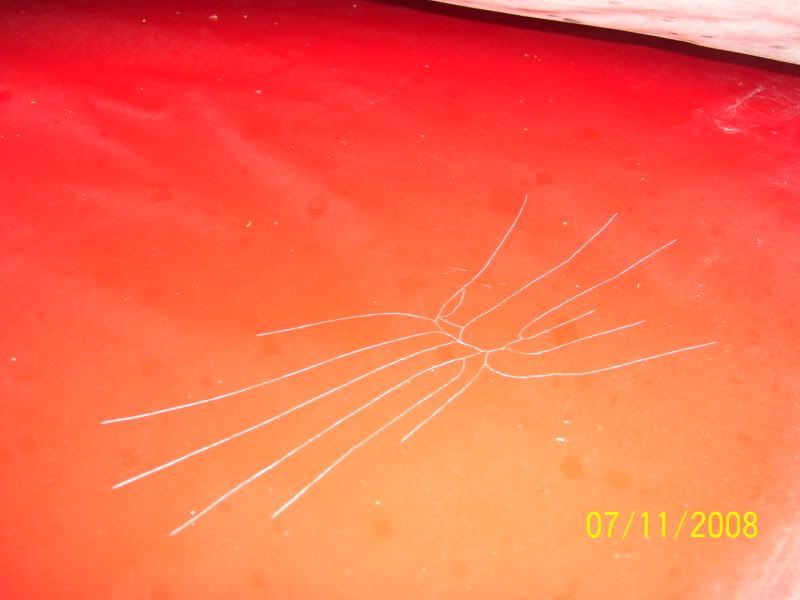
and one of on the edge from the bimini top. both sides again
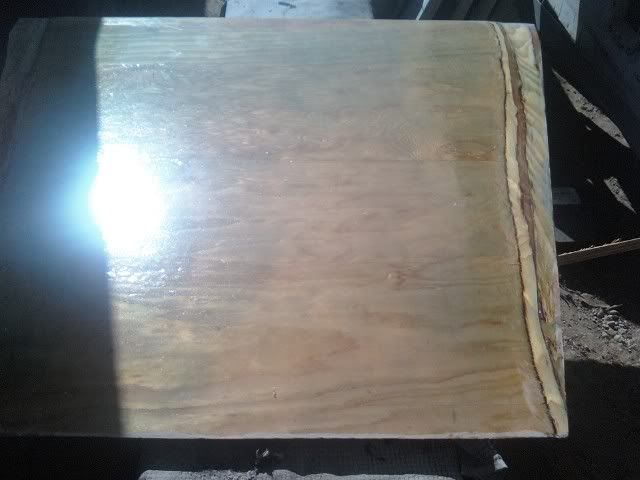
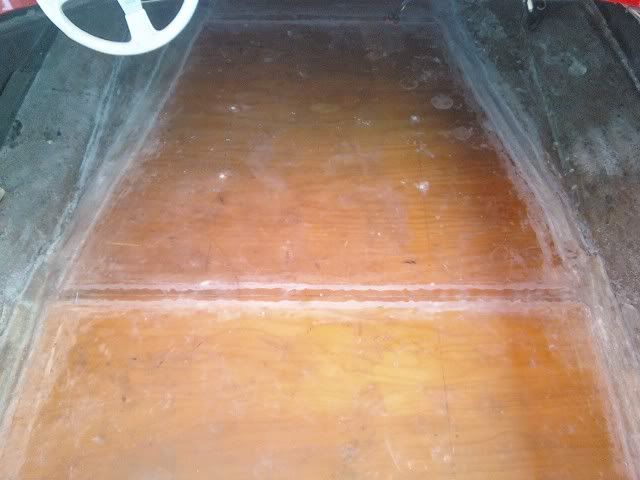
So then it got ready for new floor. Due to the boats shape and getting everything perfect this was a job. When cutting you have to account for the glass and resin width. so plan ahead
So here are the floor boards cut and resin applied to each side a few coats to keep it all sealed. Gotta keep the water out of the wood on everything. all screw holes sealed with 5200. Notice the grain on the edge. That is because it is sanded to fit perfecting in the boat. Lots of shaving.
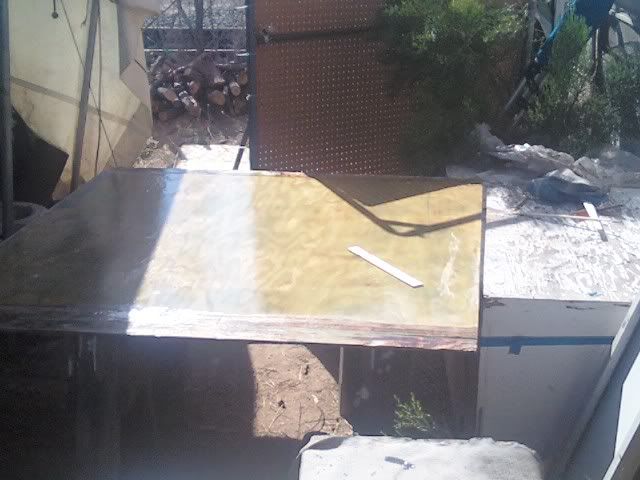
Then the foam gets poured in with the drains in place
Wish i had pics of that but its a rush rush kind of job
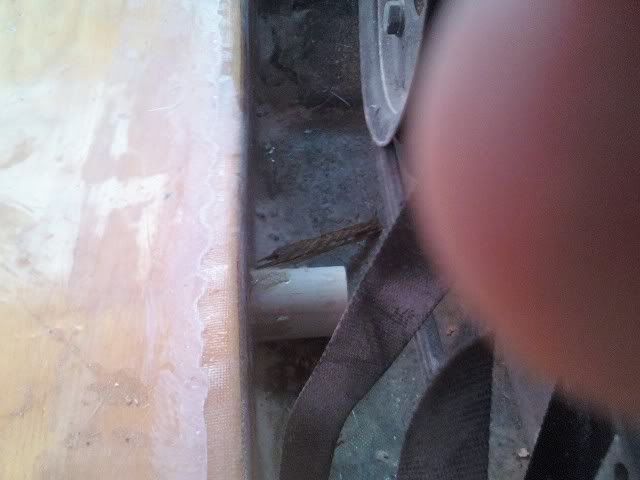
Floor glassed in. Simply beautiful
up in the front there is a drain but you cant see its soo dark. I will get better pics later.

here is where it comes out into the bilge.

-
10-25-2009, 11:29 AM #7
Member
- Join Date
- Feb 2007
- Posts
- 31
- Thanks (Given)
- 0
- Thanks (Received)
- 0
- Likes (Given)
- 0
- Likes (Received)
- 0
- Mentioned
- 0 Post(s)
- Tagged
- 0 Thread(s)
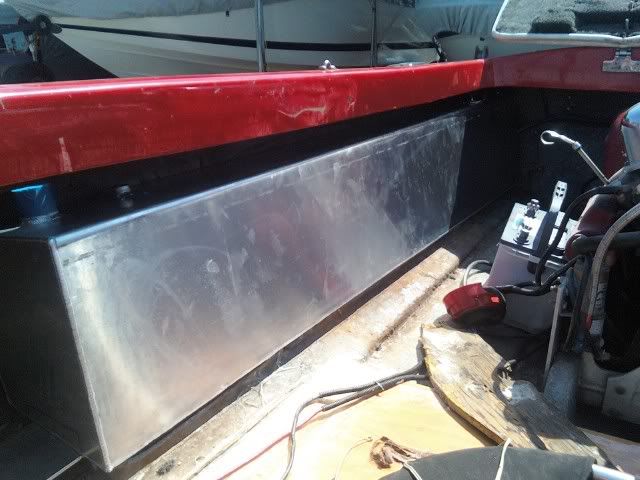
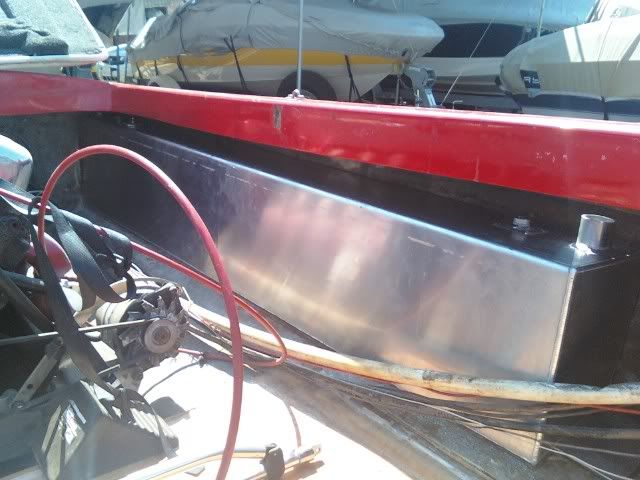
Then it went down the street for Custom aluminum gas tanks on either side. Made by this guy
http://www.americantanks.net/products.htm
He will measure and draw them out. Then weld them up with pickup tubes, baffles, fuel sender units and plenty of fittings for me to hook up my AN lines.
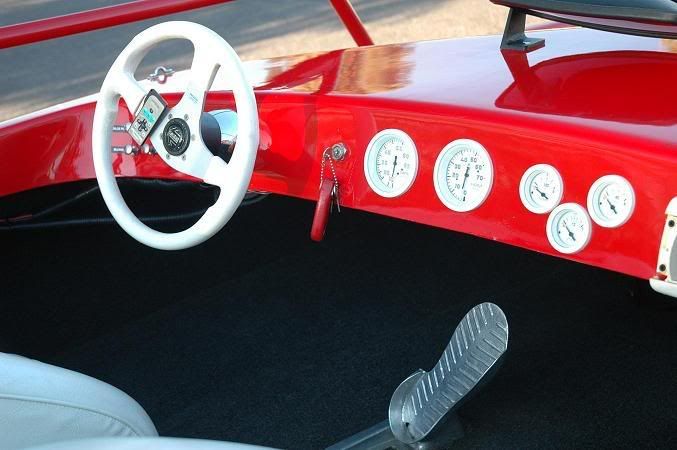
Should take a week to get them welded up and it will go back in for the bulkheads to be glassed in so the tanks can be mounted. At that same time we will be glassing in a plate on top of the floor to hold the hot foot throttle pedal down and start on custom interior structure.
After glass work is done everything will be taken out and the boat will be painted inside and out.
I am also working on a way to have the tower detachable.
-
10-25-2009, 11:29 AM #8
Member
- Join Date
- Feb 2007
- Posts
- 31
- Thanks (Given)
- 0
- Thanks (Received)
- 0
- Likes (Given)
- 0
- Likes (Received)
- 0
- Mentioned
- 0 Post(s)
- Tagged
- 0 Thread(s)
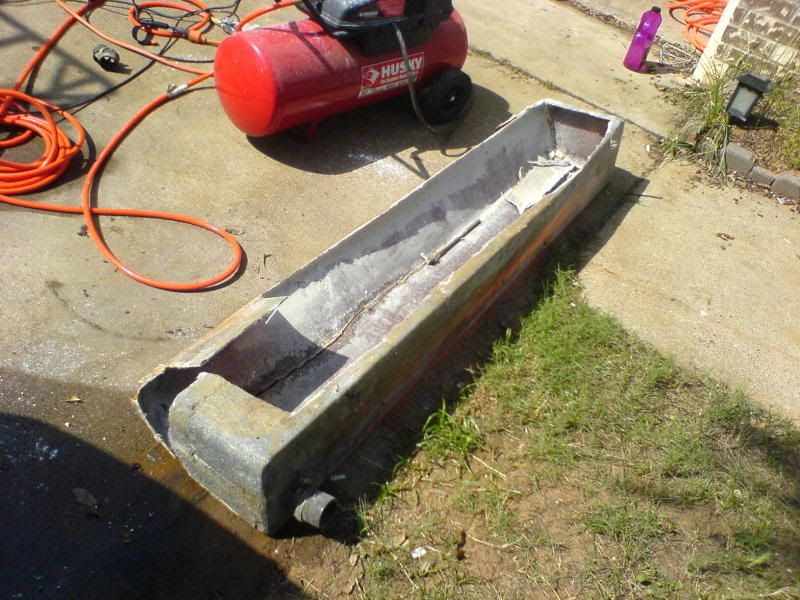
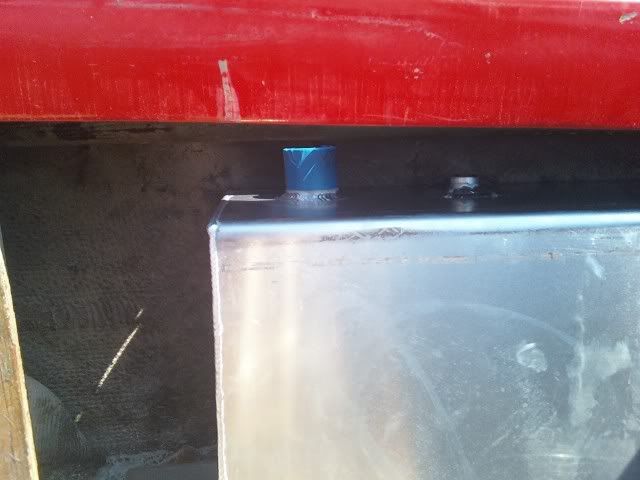
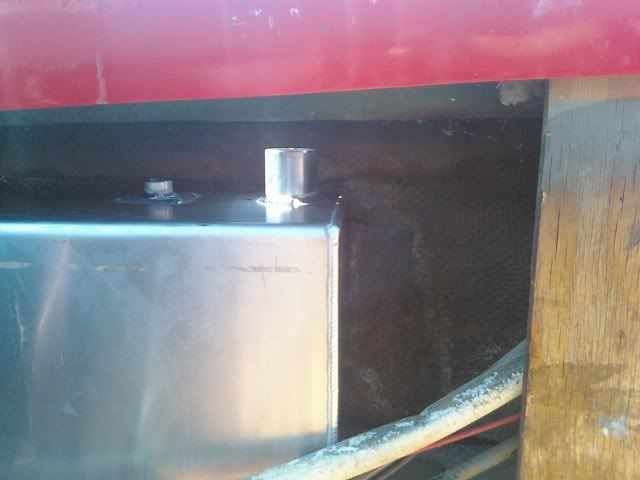
Here are some crappy pics of the beautiful tanks I had made. Each one is a little over 30gallons.
-
10-25-2009, 11:30 AM #9
Member
- Join Date
- Feb 2007
- Posts
- 31
- Thanks (Given)
- 0
- Thanks (Received)
- 0
- Likes (Given)
- 0
- Likes (Received)
- 0
- Mentioned
- 0 Post(s)
- Tagged
- 0 Thread(s)
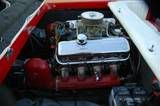
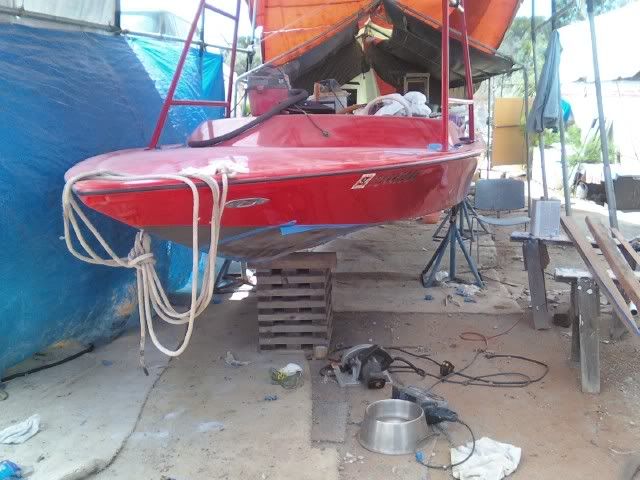
So thats where it stands right now. I think I am going to pull the motor, check the transom and figure out how I want to install these tanks. Then paint everything after the fiberglassing is done.
-
10-25-2009, 11:56 AM #10
Screaming And Flying!
- Join Date
- Jun 2002
- Location
- Sunny Fort Lauderdale
- Posts
- 9,380
- Thanks (Given)
- 0
- Thanks (Received)
- 0
- Likes (Given)
- 0
- Likes (Received)
- 1
- Mentioned
- 0 Post(s)
- Tagged
- 0 Thread(s)
On the bottom work did you glass the inside of the hull also?
Kuwait Race. http://www.youtube.com/watch?v=G7NB6A3Cudo
Abu Dhabi Race http://www.youtube.com/watch?v=3dTn-ay8G2c
Key West Race video http://www.youtube.com/watch?v=h1csGLgX4tk
Video http://www.youtube.com/watch?v=DRzyw0Jo8Zg
Video go to www.cheetahcat.com
M-11 http://www.youtube.com/watch?v=esxxtLg8qJ4
-
10-25-2009, 12:28 PM #11
Member
- Join Date
- Feb 2007
- Posts
- 31
- Thanks (Given)
- 0
- Thanks (Received)
- 0
- Likes (Given)
- 0
- Likes (Received)
- 0
- Mentioned
- 0 Post(s)
- Tagged
- 0 Thread(s)
Yes all cracks were glassed from both sides.
-
10-25-2009, 02:07 PM #12
6000 RPM
- Join Date
- Jul 2007
- Location
- Have lived and worked in New Zealand ,Tahiti,Australia,Japan , south Korea, And now Suzhou in China
- Posts
- 1,848
- Thanks (Given)
- 4
- Thanks (Received)
- 45
- Likes (Given)
- 32
- Likes (Received)
- 98
- Mentioned
- 0 Post(s)
- Tagged
- 1 Thread(s)
Dont forget that your new tanks that have replaced the boxes that were there before are now going to become your floatation so make sure they are well fixed in place in case of a total swamping , like filled completely with water reguardless of how much fuel they have in them at anytime they will become bouyancy chambers .


-
10-25-2009, 03:36 PM #13
6000 RPM
- Join Date
- May 2009
- Location
- WEST MICH
- Posts
- 1,663
- Thanks (Given)
- 0
- Thanks (Received)
- 0
- Likes (Given)
- 0
- Likes (Received)
- 2
- Mentioned
- 0 Post(s)
- Tagged
- 0 Thread(s)
Just curious seeing you have just about everything out of the boat why not pull the motor and paint that area also ( Bilge ) just to give the whole job a little more touch of class .
-
10-25-2009, 04:22 PM #14
Member
- Join Date
- Feb 2007
- Posts
- 31
- Thanks (Given)
- 0
- Thanks (Received)
- 0
- Likes (Given)
- 0
- Likes (Received)
- 0
- Mentioned
- 0 Post(s)
- Tagged
- 0 Thread(s)
 Originally Posted by tunnels

I dont know how much flotation they really are considering they are vented and normally full of fuel, but I agree they need to be very secure.
I had some large tabs/plates welded to the tanks and just have to figure out how I am going to get them in. I am thinking of fiberglassing in some plates and then bolting the tanks in. I want them to be able to be removed in case of having to do some body work or something.
And pics info around about securing custom tanks into fiberglass?
-
10-25-2009, 04:24 PM #15
Member
- Join Date
- Feb 2007
- Posts
- 31
- Thanks (Given)
- 0
- Thanks (Received)
- 0
- Likes (Given)
- 0
- Likes (Received)
- 0
- Mentioned
- 0 Post(s)
- Tagged
- 0 Thread(s)
I agree. Thats why i said I was probably going to pull the motor. I have already pulled the logs and old fuel lines which will be redone in AN braided(already have all fittings and lines). Originally Posted by OFFSHORE GINGER
but more glass work needs to be done before paint

 Reply With Quote


