User Tag List
 Thanks: 0
 Likes: 0
Results 1 to 15 of 31
-
10-02-2006, 01:12 PM #1
 Member
- Join Date
- Sep 2006
- Location
- Orlando FL
- Posts
- 36
- Thanks (Given)
- 0
- Thanks (Received)
- 0
- Likes (Given)
- 0
- Likes (Received)
- 0
- Mentioned
- 0 Post(s)
- Tagged
- 0 Thread(s)
HydroStream HST 89 structure issues?
Hey there,
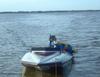
Has anyone heard about the hall issues in the early 89 HST models? I read on hydrostream.org about the nose being very weak and was not supported correctly. I was wonding if anyone had any experience with this boat? If you go to www.fastbiz.info/hst you can see some pics I took of it. notice the inside stringer it only has one without the other 2 suggested supports on it. If you check out http://hydrostream.org/Specific%20Models/HSTsplit3.jpg you will see how they added 2 other supports? I was wondering how much of a real issue is this? I looked up and down this boat and did not see any cracks. Does anyone have any comments on this vessle?
-
10-02-2006, 04:09 PM #2
7000 RPM
- Join Date
- Feb 2005
- Location
- seattle
- Posts
- 2,654
- Thanks (Given)
- 0
- Thanks (Received)
- 17
- Likes (Given)
- 0
- Likes (Received)
- 33
- Mentioned
- 2 Post(s)
- Tagged
- 0 Thread(s)
myself i would put the other two in and as far forward as you can. you could use 1/4 with it doubled along the top. then cover with 1/4 or 1/4 across the top. to lighten you may want to drill holes [2"] and cover with light glass.
-
10-02-2006, 04:55 PM #3
Member
- Join Date
- Sep 2006
- Location
- Orlando FL
- Posts
- 36
- Thanks (Given)
- 0
- Thanks (Received)
- 0
- Likes (Given)
- 0
- Likes (Received)
- 0
- Mentioned
- 0 Post(s)
- Tagged
- 0 Thread(s)
That sounds like a great idea!!! Thanks for your imput.

-
10-02-2006, 05:51 PM #4
7000 RPM
- Join Date
- May 2002
- Location
- Debary, Florida
- Posts
- 2,277
- Thanks (Given)
- 0
- Thanks (Received)
- 1
- Likes (Given)
- 0
- Likes (Received)
- 3
- Mentioned
- 0 Post(s)
- Tagged
- 0 Thread(s)
I recently (last year) completely went thru the inside of mine (floor was rotted away) and I also installed the front supports, almost all the way forward. From what I understand, these boats, without the supports, were prone to "folding", it sort of blows the bottom thru, right at the dash line, usually without waring, right after you hit a big wave/roller. Where the front bulkhead/floor meet, and it runs side to side on the boat, sets up a stress point, adding the front supports spreads the load out and stiffens the whole structure. If I remember correctly there was a fellow on here who experienced first hand a failure of this type....some really cool pictures, but not so cool of an event.
Wile E. Coyote: (acceleratus vulgaris)
Its amazing how heavy a GPS can be.....
-
10-03-2006, 07:36 AM #5
Member
- Join Date
- Sep 2006
- Location
- Orlando FL
- Posts
- 36
- Thanks (Given)
- 0
- Thanks (Received)
- 0
- Likes (Given)
- 0
- Likes (Received)
- 0
- Mentioned
- 0 Post(s)
- Tagged
- 0 Thread(s)
Hey there,
Thanks for the feed back. I will be pulling the floor and installing the 2 front support for sure. Did you run into any problems when doing this or was it as straight forward as it appears? Do you have any online photos of yours? <o></o>
-
10-03-2006, 07:51 AM #6
7000 RPM
- Join Date
- Aug 2002
- Location
- Winnipeg, Canada
- Posts
- 2,357
- Thanks (Given)
- 0
- Thanks (Received)
- 1
- Likes (Given)
- 0
- Likes (Received)
- 2
- Mentioned
- 0 Post(s)
- Tagged
- 0 Thread(s)
You don't need to pull the floor and trust me, if you were going to, it's not as easy as just pulling the floor up. I took mine apart from stem to stern; I took the deck off. If you're intent on removing the floor, I'd leave wood over top of the tunnels. In your pictures, what is that 3x3 "post" under the floor??
I did notice though that you have substantially less foam than I did. That's a good thing.
I'd also put a bilge in if there isn't one there already; put three in if you can because those HST's can leak like civs where the deck meets the hull at the back and there are three seperate hulls.
One in the left sponson, one on the right and one in the centre pod. Sounds like over kill but you may not regret doing that. Also, you can also put in access covers in each sponson; one in each. SteveA from here has them on his.
If you plan on keeping that boat, I'd do the above. Speaking from personal experience.
Boz
-
10-03-2006, 09:00 AM #7
Member
- Join Date
- Sep 2006
- Location
- Orlando FL
- Posts
- 36
- Thanks (Given)
- 0
- Thanks (Received)
- 0
- Likes (Given)
- 0
- Likes (Received)
- 0
- Mentioned
- 0 Post(s)
- Tagged
- 0 Thread(s)
Yes it is the 3x3 post in the floor. The floor seems to have rotted out there. The post is fine though. This boat has been sitting outside for a long time. The floor felt soft but that could be because the 3x3 is not supporting the deck. I would like to have a strong base again. I really have not got into the details of taking out the floor. Is it sectional? Can you just replace the deck where the seats are or does that run all the way into the tunnels as a full piece? Was it required to separate the top and bottom hulls to do this? I was planning on not going to that extreme and I believe I could add the front supports without the removal of the top. So if I am following you right about leaving the wood over the tunnels, you would cut the flooring up to the tunnels and lay in a new piece then glass it? What size trailer do you run? This one is shot out. Thanks so much! <o></o>
<o></o>Last edited by araylius; 10-03-2006 at 09:03 AM.
-
10-03-2006, 09:09 AM #8
7000 RPM
- Join Date
- Aug 2002
- Location
- Winnipeg, Canada
- Posts
- 2,357
- Thanks (Given)
- 0
- Thanks (Received)
- 1
- Likes (Given)
- 0
- Likes (Received)
- 2
- Mentioned
- 0 Post(s)
- Tagged
- 0 Thread(s)
Hey
Well, if you're going full floor, then you'll need to take your seats out, carpet out, and will need to cut along the sides where you put your paddles etc.
The floor actually runs under there and over top of the tunnels if I recall but it's a pain to get it all out. It's a fairly large job for a first time project.
If your floor is rotten hence the post, then it'll need to come out to do it properly.
Hang tight and I 'll see if I can post photos here for you. It's easier to show than to describe sometimes.
-
10-03-2006, 09:22 AM #9
7000 RPM
- Join Date
- Aug 2002
- Location
- Winnipeg, Canada
- Posts
- 2,357
- Thanks (Given)
- 0
- Thanks (Received)
- 1
- Likes (Given)
- 0
- Likes (Received)
- 2
- Mentioned
- 0 Post(s)
- Tagged
- 0 Thread(s)
Try this.....
-
10-03-2006, 09:30 AM #10
Screaming And Flying!
- Join Date
- Jul 2006
- Location
- Wisconsin
- Posts
- 5,406
- Thanks (Given)
- 1039
- Thanks (Received)
- 784
- Likes (Given)
- 9209
- Likes (Received)
- 6067
- Mentioned
- 2 Post(s)
- Tagged
- 0 Thread(s)
Mine looks like this.

I set the circular saw to 1/2" deep and cut around the vertical braces so I could pull out the floor and see what was bad.
I have only one 12" x 12" spot where the "rot" goes under the vertical braces... so I'm planning to cut that out and replace it first (slide new material under the vertical brace) and then replace the floor in two sections (front & back).
I will cut out to the vertical braces on all four sides, and replace just the "main" floor.Last edited by David - WI; 10-03-2006 at 12:17 PM.
-
10-03-2006, 10:37 AM #11
7000 RPM
- Join Date
- May 2002
- Location
- Debary, Florida
- Posts
- 2,277
- Thanks (Given)
- 0
- Thanks (Received)
- 1
- Likes (Given)
- 0
- Likes (Received)
- 3
- Mentioned
- 0 Post(s)
- Tagged
- 0 Thread(s)
I did mine a little different. My rig was one of those that they didnt quite use enough resin in the layup, when I got my floor off it looked bad. I took a electric planer and removed 90% of the dry glass, what i was left with over the tunnels was scary. I went and got some foam coring material and laminated all the tunnel tops, reconstructed all the bracing and put a sub floor down in the center pod for the driver seat, the floor is complete across the back. I also moved the steering back about 12 total, thus moving the c/g back, the boat now works like it should, the bow follows the trim at any speed with any prop, with only 200 hp.....it was an enourmus pain in the ass..... a job I would not do again. I will post pics of the finished product when i can....btw, the finished boat and jackplate weighs 680 lbs and the complete rig in race form is 1453 lbs. not to shabby for a 20 foot boat.....
Wile E. Coyote: (acceleratus vulgaris)
Its amazing how heavy a GPS can be.....
-
10-03-2006, 10:54 AM #12
7000 RPM
- Join Date
- Aug 2002
- Location
- Winnipeg, Canada
- Posts
- 2,357
- Thanks (Given)
- 0
- Thanks (Received)
- 1
- Likes (Given)
- 0
- Likes (Received)
- 2
- Mentioned
- 0 Post(s)
- Tagged
- 0 Thread(s)
I wonder what the actual weight of mine was when done. We guessed at 700-750 lbs but in reality, there was nothing but a shell. Not a lick of foam and we ground down EVERTHING in that hull. We even used 6 mm Okume over top of the tunnels to make it as light as possible. I forget the scheduleing though.
Coyote, moving weight back is great and a good point that I never mentioned.
There is room to scooch the tank back and you can mount the battery right on the transom.
-
10-03-2006, 05:08 PM #13
Member
- Join Date
- Sep 2006
- Location
- Orlando FL
- Posts
- 36
- Thanks (Given)
- 0
- Thanks (Received)
- 0
- Likes (Given)
- 0
- Likes (Received)
- 0
- Mentioned
- 0 Post(s)
- Tagged
- 0 Thread(s)
Hey Guys,
Thank you so much for the great info and pics. Nice work on the boats! David, I like how you cut the floor out up to the supports. I will have to see how bad the rot is? The job looks real intense but doable. When installing the front supports were any of you able to do this without taking the lid off? Not a lot of space there.<O </O
</O
-
10-04-2006, 04:52 AM #14
7000 RPM
- Join Date
- May 2002
- Location
- Debary, Florida
- Posts
- 2,277
- Thanks (Given)
- 0
- Thanks (Received)
- 1
- Likes (Given)
- 0
- Likes (Received)
- 3
- Mentioned
- 0 Post(s)
- Tagged
- 0 Thread(s)
I did my whole repair without removing the deck. it was a tight fit, but its do-able....
Wile E. Coyote: (acceleratus vulgaris)
Its amazing how heavy a GPS can be.....
-
10-06-2006, 04:50 PM #15
Member
- Join Date
- Sep 2006
- Location
- Orlando FL
- Posts
- 36
- Thanks (Given)
- 0
- Thanks (Received)
- 0
- Likes (Given)
- 0
- Likes (Received)
- 0
- Mentioned
- 0 Post(s)
- Tagged
- 0 Thread(s)
Since you guys are familiar with the HST, do you know where you can find a wind sheild for it or is that another custom job? I have seen several with and without. Thanks...


 Reply With Quote